Animations for presentations from Microsoft Office. Animation effects in PowerPoint
Making a PowerPoint presentation isn't difficult. The abundance of settings allows you to give them a variety of looks. GIF images are one of the ways to diversify your presentation.
Inserting a gif image will dramatically liven up your presentation. As a rule, GIFs grab the viewer's attention much better than dry text.
In order to diversify the text of the presentation, you can insert a gif-image. At its core, it is ordinary drawings, therefore, you need to insert it into slides in the same way.
There are 3 different options for inserting gif animation.
Option 1

After that, the GIF will be shown on the presentation slide.

Important! Please note that when placing a gif-animation on a slide, it will be displayed in a static way, in the form of a picture. However, in view mode, the GIF will come to life and move.
Option 2
Step 1. Open a new or blank presentation slide. Above will be the title, below is a window with several icons.

Step 2. From the 6 proposed icons, select the lower left one and click on it. She is responsible for inserting pictures and gifs.

Step 3. After clicking on the icon, an additional window opens, where we are looking for the necessary file with a gif on our computer. Select the desired file. After clicking on the gif-image, press the "Insert" button.

GIF added.

Option 3
GIF added.

Important! Adding special effects to a gif image can prevent it from being displayed correctly. For example, adding a border to a GIF will turn it into a regular, static drawing. But this effect does not apply to adding shadows.
How to insert gif animation into every slide
Some presentations may require gifs on each slide. Of course, you can use any of the methods already listed, but there are 2 simple and effective options that can significantly speed up the process of inserting a GIF into a presentation.
Option 1
The combination "Ctrl + V" will allow you to insert gif-images into any number of slides. The advantage of this method is that the gifs will be located in the same place.
Option 2
The option with the insertion of a template containing gif-animation will be no less effective. To work with templates you need:
Step 1. In the top line of the program, look for the "View" tab and go into it.

Step 2. In the line that opens below, look for "Slide Master", click on it.

Step 3. After clicking on the "Slide Master" the program will switch to the mode of interaction with templates. We create the required version of the template:

Step 4. After the template has been successfully created, exit this mode by clicking the "Close sample mode" tab.

Step 5. Apply the created template to the desired slides. To do this, in the left vertical field containing the slides, press the right mouse button on one of them. In the window that opens, look for "Layout", move the cursor over it and mark the created template there.
After that, the slide will be changed, and a gif-animation will be added to it.

On a note! This option is suitable for cases when you need to add a large amount of gif-animation to the presentation. For isolated cases, creating a template will be ineffective.
How to insert a non-looping gif animation
It so happens that a gif image is not cyclical. In this case, you will need to use a different method of inserting it into your slides so that the image has a cyclical effect.
For this you need:
- At the top of the program, click the "Insert" section.
- In the "Insert video" window that appears in the "Video files" block, open the list by clicking the down arrow and select the "All files" option.

- Find the file you want, select it and click "Insert".

- Video added. After adding the video, go to the "Working with video" tab.

- Going to "Working with video", we begin the process of editing the playback. To do this, activate the "Playback" tab.

- We are looking for the "Continuous" function, mark it.

- Having marked the necessary settings, exit the editing mode by clicking on an empty space with the left mouse button.


When adding a gif image as a video, it can greatly affect the quality of the gif. You should also take into account the fact that the gif-animation must be downloaded to the computer, and not saved as a picture. Otherwise, you can get a regular, static image.
How to animate text or object in a presentation
It is not necessary to add gif images as a variety of presentation. You can animate parts of text or objects separately.
In order to give a text or object an animation effect, you need:
- Select the text or object you want to animate with the left mouse button.


We close the program. Animation effects added.
How to control animation effects
The animated parts of the presentation can be controlled. To do this, you must set the required settings in advance in the "Animation" tab.
Step 1. Click on the "Animation area" column, after making the active text or object with animation effects.

Step 2. On the right side of the page, double-click the animation name in the list to open the settings block:

- to start the animated effect when switching slides, you must set the On Click parameter in the Time tab in the Start column;

- in order for all animated objects to start synchronously, you need to set the "With previous" parameter;

- in order for the animation effects to start in turn, set the "After the previous" parameter;
- the duration of animated effects can be adjusted for yourself using the "Duration" setting.

How to add multiple animated effects
You can add several animation effects to text or an object. This requires:
- Using the left mouse button, select the desired part of the text or object.
- Click the Add Animation button.

- Add another animation effect using the Add Animation button.


Important! Adding an additional animation effect is possible only in this way. Any other method will entail replacing the animation effect, not adding a new one.
How to change the animation playback order
Sometimes animation effects are required to be reproduced clearly. In order to set up the correct playback sequence, you must:
- Using the mouse, select the object on which you want to change the animation playback order. Go to the Animation tab, where we select the Animation Area.

- In the "Animation area" tab with the left mouse button, select the animation effect that we want to rearrange. The figure shows how animation effect 1 is lowered under animation effect 3. Release the left mouse button.


The rearrangement of animation effects is complete.

How to remove gif animation from a presentation
To remove a gif image from a presentation that was installed using the program itself, there are two options.
Option 1

The animation effect has been removed from the current slide.
Option 2

Sometimes, however, you only need to remove one animation effect from a text or object. For this you need:
Video - How to Find and Insert a GIF in PowerPoint
Any shape, picture or text can be animated. Moving pictures, appearing and disappearing captions and images bring the presentation to life and make it more interesting.
Possibilities animations in PowerPoint 2007 very big. First, you can animate the slide transitions. Go to the tab Animation, and right in the middle of the command feed, you can choose different options slide-to-slide transitions that you can make.
By pressing the button Extra options below the buttons for scrolling the list, you can expand this entire list, and choose what you like: appearing on the right, on the left, unfolding in the image of curtains, and much more. When choosing, click on any option, and see how it will look. If you like it - press the button Apply to all .
You can also change the slide change option: by click, or by time. This change is done in the tab Animation, using the command Change slide : You just put a tick in the desired checkbox. If you choose option Automatically after , then you can immediately set the time. And then don't forget to press Apply to all to apply the changes to the entire presentation, not just one transition.
At the bottom right are presentation view modes. There are three icons there: Normal, Slide Sorter, Slide Show ... The first two icons are for working on slides, and the third icon Slide Show turn on when you need to watch or show your presentation to the audience.
In demo mode, you can press the buttons located in the lower left corner. They become visible only when you hover over them with the mouse. These are the forward and backward slide buttons, the draw button, and the menu button.
You can also use the up and down arrow keys to switch between slides and the Enter... To exit the mode Slide Show you can also use the button Esc .
Let's go back to animation in PowerPoint. You can animate not only slide transitions. IN PowerPoint 2007 you can animate any object: drawing, shape, picture, text. You can make the images, one by one, or all at once, appear, move, disappear, rotate.
 To animate objects go to the tab Animation, and press the button Animation setting
... A panel appears on the right. Animation setting
.
To animate objects go to the tab Animation, and press the button Animation setting
... A panel appears on the right. Animation setting
.
Now select the object on the slide that you want to animate and click on the button Add effect ... Various options appear that you can look at and choose the one you need:
- Entrance: occurrence, flash, departure, creep, other effects.
- Selection: rotation, resizing, lightening, and so on.
- Exit: flying over the edge of the sheet, or disappearing.
- Movement paths: here you can select the movement of the object in a straight line, or along a given path.
- on click;
- simultaneously with the previous effect;
- after the previous effect.
After that, this animation effect will appear in the window below.
 If you choose after the previous effect, you can click the drop-down icon to the right of that effect, select Time, and specify the delay time.
For example, you have two effects: the first - the picture arrives on the slide, the second - flies away or disappears. So you can set a delay so that the picture hangs for a while.
There are a lot of animation options in PowerPoint, you can make a very interesting presentation that will look professional.
When you select a slide and open the panel Animation setting , all the animation effects on this slide appear in the large window. Any animation can be replaced with another by selecting it and clicking on the button Change at the top of the panel. The animation can be removed, or by clicking the drop-down list, you can change its parameters.
Video on How to Make Animations in PowerPoint 2007
More detailed information can be found in the sections "All courses" and "Usefulness", which can be accessed through the top menu of the site. In these sections, articles are grouped by topic into blocks containing the most detailed (as far as possible) information on various topics.
You can also subscribe to the blog and learn about all new articles.
It does not take a lot of time. Just click the link below:
PowerPoint helps you skillfully manage your audience's attention. One of the most effective ways to focus the viewer's attention - using animated GIFs. Why is it worth taking the time to learn how to insert a GIF into your PowerPoint presentation? The answer is obvious, an animated GIF is a great tool if you need to grab the audience's attention, correctly place accents and make the audience smile.
How to insert a GIF into a PowerPoint 2010/2013/2016 presentation?
Standard add methods
In all recent versions of PowerPoint, the algorithm for adding an animated GIF file assumes the same sequence of actions.
- Open the slide that will host the GIF.
- Click on "Insert" > "Drawings".
- In the Insert Picture window, select the GIF file.
- Click Open or Paste.
The GIF file can also be added to the presentation using a special icon.

You can also drag and drop GIFs into PowerPoint. This action requires only three steps.
- Minimize the GIF folder to standard windowed mode. To do this, just press "Minimize a window".
- Open the GIF folder on top of your presentation.
- Drag the image you want to the slide area.

Adding GIFs is no different from pasting images of other formats. By default, pictures are added to the center of the slide or to a specific area of content. To see the result, click the icon "Slide show"(bottom pane of the PowerPoint window).
Insert into a template
This method is useful if you need the presence of the same GIFs on all slides. In this case, it is most convenient to make the image part of the template.
- Click on "View" > "Slide Master".
- Create a slide layout by adding a GIF to it.
- When you've finished creating your slide layout, click "Close Pattern Mode".
- To apply a template, click on the desired slide and select "Layout".
- Check the previously created option.


If a certain GIF image is not to be present on all, but only on a few slides, a well-known chain of actions can be used: Select > "Copy"(keyboard shortcut CTRL + C)> "Insert"(keyboard shortcut CTRL + V).
How to insert GIF into PowerPoint as video?
This method is used if the GIF image is not cyclical, but the demo requires the animation to repeat itself.
- Click on "Insert» > "Video» > "Video on the computer» .
- In the window "Insert video" choose "All files".
- Select the desired GIF file and click "Insert".
- Using the tab "Working with video", edit the playback process. In the appropriate boxes, check "Automatically" and "Continuously".
This method of inserting a GIF file may affect the image quality.
Important! To use an animated GIF, you must first download it to your computer. If you just copy it, you will get a regular static image.
Editing GIFs
Like other images, GIFs are editable. You can change some of the file properties using the ezgif.com Internet service. With this editor, you can change the number of animation cycles. The following instruction will help with this.
- In the Upload image from your computer section, click "Select a file".
- Select the file you want and click "Open".
- Click "Upload"... After that, the page should display the GIF file itself, as well as information about it.
- Click on « Splittoframes! "... After processing, a frame-by-frame representation of the animation should be displayed.
- Click on « Editanimation "(the button is located under the frames).
- Specify the required number of file plays in the field "Loop Count".
- Click on "Make a GIF!".
- To download the edited picture to your computer, click "Save".


How GIFs work in a PowerPoint presentation
Once added to the presentation, the GIF file is treated as an image. This means that you can work with it as with a regular photo. For example, you can absolutely freely edit the size of the picture.
GIFs are stable presentation elements, so you can apply additional animation effects to them. If the GIF is selected, then using the tab options "Format" you can change the style of the image: define borders, add effects, select a frame, etc.

Important! Usually, changing the basic parameters of the picture does not affect the performance of the animation. However, some parameters can turn an animated image into a static one. Therefore, after finishing editing the gif, it is recommended to start the presentation demo mode. This will check if the picture is still animated.
In the process of working with the presentation, the GIF file will look like a static picture. The animation can only be seen in the mode "Slide show"... When adding GIFs to your presentation, remember that they significantly increase its "weight". If there are restrictions, keep track of the size of the inserted pictures.
It is recommended to use simple GIFs for presentations, which will not distract the audience's attention from important information. Some GIFs can serve as slide backgrounds. Alternatively, you can use GIFs with text frames overlaid on top. When choosing gifs, a sense of humor will not be superfluous. Cheerful animated pictures relieve the atmosphere well.
Before inserting a GIF into your PowerPoint presentation, assess the appropriateness of use. of this type Images. If you can clearly define the function of the added GIF file, then everything is fine. But if the animated picture does not help in any way in revealing the topic of the presentation, it is better to refuse it.
: hyperlinked the text, picked up the background, inserted music and video, it's time to add animation to it for text, graphs and images. Thanks to this, your presentation will look impressive and the viewer will be more interested in watching it. And you, in turn, will be able to make additional emphasis on the necessary details.
In this article, we will look at various effects, how to insert, customize and remove animation in PowerPoint. Now let's talk about everything in order.
Animation effects
First, let's figure out what effects exist in PowerPoint. Open the presentation and go to the "Animation" tab. Now click either on the black arrow in the "Animation" group to expand the entire list, or on the "Add ..." button. The drop-down lists in both cases are completely identical.
In the program, it is divided into four types: "Enter", "Select", "Exit" and "Move". The list contains their main types. To view all the options for each type separately, you need to click on the corresponding button at the bottom of the menu.
Here you can choose how the text or image appears on the slide. You can set the object to rotate, appear as a selected shape, or slide smoothly into place.

Additional Highlight Effects... This is great if you want viewers to pay attention to a specific text or image. Applying it to the text, you can emphasize it, recolor the color of the letters, increase it.

"Additional exit effects"... Applying given view to the object, you can hide it for a while from the slide or make it so that it disappears from the slide over time and does not appear at all.

"Other ways of movement"... Here you can choose a different path along which the object should move. For example, you can set a trajectory for a picture on which a car or any animal is drawn.

After we have got acquainted with the main effects, we move on to the second part of the article.
How to make it
Creating animations in PowerPoint is quite fun. First you need to select the text or picture to which it will be applied. Now open the dropdown menu with different kinds... If you click on any of the options in it, the effect will be applied immediately.

I prefer to choose the effect through the dialog boxes for each type separately. Let's make the text "Comp-Profi" more interesting. Since this is a title, apply one of the Input group effects to it.
We pass "Add animation" – "Additional Entry Effects"... The already familiar window will appear. Look at the "View ..." checkbox below. Next, click on any view and see how the text will appear on the slide. When you find a suitable option, click "OK".

Animation for images is selected in the same way. Select it, then, using the dialog boxes with different types, select the appropriate type of entry, selection or exit.

If you need the image to move along the specified trajectory on the slide, click "Add animation" then in "Ways of movement" choose "Custom path".

The cursor changes to a plus sign. Hold down the left mouse button and draw a path for the image or text. In the place where the end point should be, double-click the mouse. The object will move relative to its center. The green arrow means the starting point, the red one the ending point.

If animation is applied to the text or picture, there will be a number next to them in the upper left corner. It also shows the order in which objects will appear on the slide.
In the example, the text "site" will appear first and after it "Installing and Configuring Windows".

Customization
After you have chosen the appropriate option for the text or picture, you need to configure it. To do this, you can use buttons in groups "Extended animation" and Slide Show Time.
By clicking on the button "Animation area", the corresponding window will open on the right, in which you can also make various settings.

Let's set it up for the site title. In the corresponding area, it is called Heading 1, select it with the mouse.
It can be played: by clicking the mouse on the slide, together with the previous one, or after the completion of the previous animation. Here you can also configure its duration and delay - after how long the text should appear on the slide.
You can set the duration using the extended timeline. Move the cursor over it to make it look like an arrow pointing to the right and left, click the mouse and set the appropriate time.

You can customize the animation by clicking in the area with the same name opposite the desired object: text or picture, on the small black arrow. From the dropdown menu select Effect Parameters.

A dialog box opens with three tabs: Effect, Time, and "Animating text"... If you set it up for a picture or for motion paths, the last tab will not be there.
Select the options you want and click OK.

You can see how we set everything up on the current slide by clicking on the "View" button in the animation area.
If you need to change the order of its playback for text and pictures, select the corresponding field in the animation area and, using the "Order" arrows, move it to the desired position.
Now, in the example, the subtitle "Installing ..." appears first, followed by the slide title.

You can also customize the effect for the selected type of animation. For example, I chose Appearance for the text. I select the text on the slide and press the button Effect Parameters... Here you can choose where the object will appear from: right, left, top or bottom.

How to delete
And the last thing we will look at in this article is removing animation on a slide.
Click on the number in the upper left corner of the text or picture for which you want to delete the animation - the number will be highlighted. Now press "Delete" on your keyboard.

There is also another way. In the area on the right, select the required line and click on the arrow. Select "Delete" from the drop-down menu.
Has a sufficient number of images, we have already made sure by considering the possibilities of selecting them from this online library. Now let's pay special attention to animations and how to add them to PowerPoint presentations 2010. In general, it is as easy to insert animation into a presentation as ordinary pictures. But there are nuances.
Ways to add animation

1. Program ribbon: Insert - Image - Image.
Windows Explorer will open for selection. Or you can just drag the desired animation file with the GIF extension directly onto the slide.
2. Working area: Picture.
Connects the internal library of the program and provides access to the online library. A panel (usually on the right side) with Microsoft Office pictures will open. Neither illustrations nor photographs are of interest to us now, but only the objects of the video. We put the bird in the appropriate field.

Then in the "Search" field you need to add a search keyword and click the "Start" button. All selected images for presentation will be in GIF format, i.e. animations as intended. Clicking on the picture adds an animation to the center of the slide. Accordingly, it will be possible to move it, resize it. Everything is the same as with a regular image.

If the options for the pictures are not enough, then the animations can be found on the site with images of Microsoft. Choose a category or go straight to the search bar. By default, the selection will show all types of images. It is necessary to establish additional requirements for filtering out unnecessary things. Namely select "Animation". In this case, all subsequent pictures will be dynamic. All that remains is to download and insert them in accordance with the first option for adding pictures.

However, the animations added to the presentation may not please the participants of the presentation as long as they sometimes want. Most of these images do not have continuous animation. Those. they are executed once, and then the picture becomes static.
How to insert animation into a presentation
(so that it does not stop, if the cyclicality is not provided by the developers of the animation picture).
The method is identical to inserting a video in PowerPoint 2010. So, we proceed sequentially: the "Insert" tab, the "Multimedia" group, "Video", "Video from file". Opening desired folder, you will notice that no GIF files are reflected there (GIF is essentially a picture). Open the list with file types and select "All files". The animation will appear and you can add it to the slide.

But it will no longer be inserted as an image, but as a video. This means that the corresponding settings will become available. In the settings, the "Playback" tab is of interest. For the picture to start automatically and repeat, you need settings
- automatically,
- continuously.

 The fastest boat in the world!
 The history of the Off-White brand
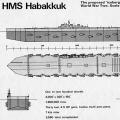 Habakkuk: how the British tried to build an aircraft carrier from ice Why the project was curtailed