Plasticine cylinder. Summary of a modeling lesson "Acquaintance with plastic material (plasticine)" Ball, cylinder, cone. Modeling simple geometric solids
Starting to work, first take a small piece of plasticine, since it is easier to knead it, and warm it up with your hands. The clay will become soft and pliable. Add new pieces little by little, softening them as well, and start sculpting.
Learn to carry out the basic elements, the description of which is given below, since they can be used to sculpt anything that your fantasy tells you. At the same time, if something did not work out for you, do not be discouraged, because you can just crush everything and try to do it again.
Ball
After plucking off a piece of plasticine, give it the shape of a ball, as shown in the figure. The longer you roll it between your palms, the smoother, softer and smoother it will be. Try to blind
balls of different sizes.

Egg
First, make a ball, and then lightly roll it back and forth between your palms. When it turns into an oblong oval shape, round off the ends.

Pancake
You can make a pancake from a ball. Simply squeeze it between your thumb and forefinger, or flatten it between your palms. If the edge of the pancake suddenly cracks, fill in the tears. Pancakes, like balls, can be of different sizes.

A drop
To make a drop, pinch the ball at one end and pull it out a little. It turned out something like a "nose". Now remember what a drop looks like and compare with what you have done.

Cone
If you press the thick end of the drop to the board ("nose" up), you get a flat base. Sharpen the thin end and the drop will become a cone.

Snake
This element is very often used in sculpting. Roll a piece of plasticine back and forth on the board until it is long and thin.
The longer you roll it, the thinner, longer and smoother the snake will be. However, very thin snakes sometimes break, which is easy to fix by connecting the break and rolling again.

Sausage
We will call a short fat snake a sausage. Roll a piece of plasticine on the board without pressing too hard.
Cylinder
Roll up a short, thick sausage and flatten both ends against a board. If it loses its shape a little, roll it again on the board. Or you can make a cylinder in another way - cut off the ends of the sausage with a knife.


Box
You can make a box out of a cylinder. Place it with the rounded side on a board and lightly press down on top with something flat: another small flat board, a jar lid, or the bottom of a cup. Turn the cylinder over so the flat surfaces are on the side. Press down on the top of the cylinder again. Now it has six straight sides: four side and two end. Place it on the end and press it down again. The cylinder has turned into a box. By turning and squeezing it from different sides, you can achieve any shape and size.


ribbon
Roll a thin snake to get the ribbon. Put it on the board and roll it along with a pencil. The pencil, like a small roller, flattens the snake and turns it into a ribbon. The most difficult thing now is to separate the tape from the board.

You may need to practice a little to keep the tape from smearing across the board. This works best if you do not make the tape too thin and work on a very smooth surface, having previously moistened it with water.
Of course, many more different elements can be molded from plasticine, but for now these are enough for us. And now the fun begins!
You should not think that if you give a child plasticine in his hands and put him in the workplace, he will begin to create his masterpieces with joy and enthusiasm. Of course not: the child must learn. So you can start simple. For example, with how to gradually mold a horse from plasticine. This is a fairly simple and interesting model to make, especially if you take some fairy-tale or cartoon character as a nature.
Undoubtedly, plastic animal modeling is an exciting lesson for children, but before starting, you need to prepare everything you need. Prepare your work area. Find a firm, level surface to work on. Oil-based clay can leave greasy stains on uncoated work surfaces, so it may be helpful to cover the work area with newspaper or wax paper. Place a picture of a horse in front of you. To mold a plasticine horse in stages, you need the following materials and tools:
- plasticine of different colors;
- cardboard for the stand;
- knives for cutting plasticine;
- toothpicks.
Now that everything is done, let's start sculpting. First, you need to decide how big the horse will be in order to understand how much plasticine is needed. And you also need to choose the color of the horse. This animal usually comes in the following colors:
- white;
- black;
- brown;
- gray.

Then you need to knead and warm the material for modeling... Do this by squeezing it between your hands, or place it on a work surface and knead it like dough until it is warm, soft and easy to work with. It is necessary to cut the resulting mass into four parts using a knife, this will make it possible to mold a horse from plasticine in stages. One piece should be slightly larger than the other three (which should be about the same size).
 To make a horse from plasticine, you need to take the largest part and turn it into a cylinder. Gently grasp one end of the cylinder and pull upward to form the horse's neck. Since the neck will support the horse's head, don't make the neck too long or too thin.
Then shape the horse's head... Take one of three equal sized pieces. Then gently pinch one end, lengthening it (this will be the horse's nose and mouth).
Sculpt two triangular ears and two round eyes. Roll two small white balls to sculpt the eyes. Carefully attach the eyes and ears to the larger end of the horse's head. Use a toothpick to poke one hole in the eyes. Finally, attach your head to your neck.
 Sculpt the horse's legs... Take a third piece and divide it into four smaller pieces of equal size. Create long, cylindrical legs by rolling each of these pieces between the toes until they are both long and thick in proportion to the horse's torso.
Break off a small piece of black plasticine to use for making hooves. Make short cylinders out of these pieces. Attach these cylinders to the bottom of each leg. Now stick two legs to the front of the horse's torso and two to the back.
Add the mane and tail. Form hair strands from small pieces. Attach the tail to the back of the horse's torso and the mane to the back of the horse's head and neck between the ears. For the mane and tail, use a different color than the body.
If done correctly, you should make a beautiful horse. To do this, you must constantly check with the image of the horse. You can cut it out of paper to keep the proportions according to this template. It will be even easier if you cut it into pieces: torso, head, legs and check your work on these parts.
 Plasticine is a material that children learn from an early age. Due to its plasticity, softness, properties of maintaining the desired shape, resistance to moisture, it turns into a simple tool for modeling any shape in the hands of a child. It develops motor skills and finger sensitivity, mental skills and trains memory.
The variety of this material opens up unlimited creative possibilities. If your child wants to model, his creative brilliance cannot be ignored. To develop the child's desire, to form and awaken his talent, you need to teach him to think creatively. For example, it is necessary to explain to the child that a complex product can be molded from small parts that need to be formed and connected in stages.
By the way, when parents are learning to make plasticine horses, they can offer to collect the entire zoo or to mold fabulous animals, such as, for example, a unicorn. For this there is sculptural clay, which hardens after immersion in hot water. After the child has worked out all the modeling skills, you can learn how to work with clay.
How to choose plasticine
 Before modeling an animal, you need to choose plasticine. In this case, it is better to focus on the age and abilities of the child: for the smallest, a soft and elastic look is suitable, for older children it is better to buy plasticine of moderate softness.
There is a large selection of plasticine on the market, whose bright colors will delight children with their diversity. Do not buy products containing harmful substances for children. Pay attention to the products of foreign companies. They are much more expensive, but natural ingredients are used to create them.
Extremely bright, unnatural colors in a product can be a sign of harmful chemical dyes. A pungent odor indicates the use of toxic components in production.
It is even difficult for us today to imagine any animal of the same size as the ancient diplodocus. Scientists have proven that these herbivores were so huge that it was simply impossible to see their upper part. In length, these giant lizard-like ones reached 30 m, which is equal to the height of a nine-story house. Let's try to mold our miniature copy of a huge dinosaur from plasticine. Such a craft should definitely add to the collection of self-made exhibits.
1. Brown plasticine is suitable for sculpting diplodocus. First, knead the entire prepared mass in your palms. Then place it between your palms and, swinging in different directions, form a ball.
2. Next, you need to grab a part of the plasticine from the ball and pull it out with your fingers into a long tail tapering to the bottom. This must be done immediately after softening the plasticine, if the original workpiece is left for a while, the plasticine will harden, it will be difficult to process it. You will have to start the first stage of sculpting anew.

3. Also extend the opposite side, but do not constrict the scion, but keep it straight.

4. With the plasticine sketch of the dinosaur back to you, form a thin membrane over the entire neck, back and tail.

5. The legs of the diplodocus are straight tubes. Make matching cylinders from the same brown plasticine, preferably larger hind legs.

6. Attach the limbs with matches to the oval body.

7. Place the disproportionately small head of the herbivorous dinosaur at the end of the neck. Just add shallow eyes and slit the mouth with a stack.

So our unknown giant is ready. In general, one can endlessly fantasize on the topic of prehistoric animals, because in fact no one knows how many species of dinosaurs existed on earth.


Today we will learn how to sculpt a cute dragon - the character of the cartoon "How to Train Your Dragon". The individuals shown in the animation led an active lifestyle under cover of the night. Their dark color made it possible to disguise themselves against the background of a dark sky and unnoticeably fight against enemies. It is natural to assume that to create the craft we will use dark plasticine, dark purple, gray or even black material is suitable. The child will definitely like the process of creating a small toy with his own hands, because the night fury - as the main character was called - is a hero who takes center stage in the maelstrom of events taking place on the screen.
1. We offer you to mold a night fury from gray plasticine. Dilute the gloomy black with a little snow white.
2. Tear off some of the resulting plasticine and blind your head. It should be triangular with rounded corners.

3. Blind an oblong body from plasticine of the same color and gradually move it to the tail, gradually narrowing it.

4. Pierce the torso with a match in the neck area and place your head on it. Such a maneuver will allow you to reliably connect the parts together.

5. Make the legs of the night fury out of four elongated tubes, having previously measured their size with the parameters of the already finished torso.

6. To securely attach the legs to the body, use matches as well.

7. Knead a little more gray plasticine in your hands, then press down with your finger until a thin cake. Make a few notches to get the fluffy tip of the tail.

8. Attach the last piece to the tip of the tail. Also attach a row of small scales close to each other along your back.

9. The only bright spot that will be used in our craft is the dragon's large yellow eyes. Attach them to the front part, pierce the nostrils with a pencil lead, mold sharp ears from gray plasticine.

10. Spend the remnants of gray plasticine on sculpting the wings, they should have a triangular shape.

11. Attach the wings to the back using a thin wire.

This concludes the manufacture of this plasticine craft. Another time, try sculpting a similar plasticine dragon craft. Dragon sculpting is a related work.

The final view of the craft.
 Games and contests for the company for the birthday of an adult
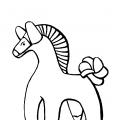 Summary of the lesson "Dymkovo toy" for children of the preparatory group
 Tips for a Beginner Toastmaster Exercises for Event Leaders