Business card standards. What are the standard sizes of business cards. Potential difficulties with violations of Russian standards
If small errors are found in the layout that do not allow the order to be completed in good quality, our manager will contact you and suggest options for correcting the layout. The cost of edits is from 200 rubles.
Two types of layout files are accepted: raster ( TIFF, JPEG) and vector ( PDF, PSD).
File size (pre-trimmed format)
Product size (cut size)
Safe area
Layout file size(pre-cut format) -
this is the file size printing products, taking into account the crop margins, departures.
The size of this file is larger than the size of the finished product by 5mm(overhang size) on each side. or + 10mm to the width and + 10mm to the height of the finished product.
For example:
Leaflet A4 = 210mm wide and 297mm high + overhangs = 220x307mm.
IMPORTANT!
An exception - Business Cards:
Business cards have departures 2mm on each side or 4mm in width and height.
Standard business card size - 90x50mm,
and with offsets the size of the ready-to-print layout (pre-cut format) = 94x54mm.
SECURITY ZONE
shows the boundaries of the zone in which it is recommended by designers and technologists to place the information and graphic elements you need so that it is not stabbed during manufacture. By placing the main elements in this area, you will be sure that they will not cut themselves and will be at a sufficient distance from the edge of the cut.
Calculated from the size of the finished product:
We retreat inward by 5mm (inlets) on each side.
For example:
Business card size = 90x50 mm - minus 5 mm on each side, which means the area for text placement = 80x40 mm.
IMPORTANT!
Background image it is necessary to cover the entire area of the layout, including the pre-trimmed area. Real size finished goods is equal to the cropped format but the background image of the correct layout fills the entire pre-cropped format.
Technical requirements for preparing the layout:
Formats |
TIFF, JPEG, PSD, PDF |
Permission |
300 dpi for all printing products, for business cards from 300 dpi to 600 dpi For large formats from 200 dpi to 600 dpi |
Layout size |
Actual size + 5mm on each side for bleed, for business cards + 2mm on each side |
Workspace |
Should not contain non-printable objects (marks, cutting lines, comments) |
Save options |
When saving, you must use the "Uncompressed" function and merge all layers |
Color profile |
For optimal printing use - CMYK (CoatedFOGRA39) |
Total paint coverage |
Not more than 300% |
Minimum font size |
7pt |
Deep black |
C80 M60 Y60 K100 |
file size |
The maximum upload file size must not exceed 100 MB |
Departures and departures
In view of the huge number of layouts that can lead to an unsatisfactory result, let's try to tell you what "crashes" and "crashes" are.
Departures - allowances to the cut size, which must be created when a part of the image goes "under the bleed", that is, the cut line runs not over the empty field of unprinted paper, but over the picture. Departures - 2 mm on each side, overhangs - 5 mm, respectively, inside on each side.
* in the image below, the dark frame is a part of the working area of the program (in which we create a business card layout), which is not any layout element. The white rectangle is a document we created (94 mm x 54 mm), which will later become a business card layout.

Next, we place all the important information (text, logo, etc.) inside the guides farthest from the edge (in the inner rectangle formed by the guides). Everything that crosses these guides - the background (it can be: photos, plates, etc.) should go to the edge of the working area.
Features and wrong layout
If no overhangs are left, stripes of unprinted paper may form along the border of the sheet after trimming, moreover, with inaccurate cutting, they will have different widths in different parts of the image, that is, they will leave the impression of an oblique cut. In addition, there is a high probability that with different sides sheet white areas will be different sizes, which will increase the feeling of inaccurate work.Let's consider, at first glance, the correct layout that meets the size requirements: 94 mm x 54 mm.
* in the image below, the dark frame is a part of the working area of the program (in which we create a business card layout), which is not any layout element.

Why is this layout not correct? The point is that the ligament tolerance " printing press+ cutting "is 2 mm and a few degrees.
Any cutter has a margin of error. Thus, when cutting the printed business cards of the above layout, you may get the following options:

Left business card: The cutter missed left and up (white stripes). Business card on the right: the cutter "missed" to the right and down (white stripes).

The cutter "missed" and the white stripe conceived by the designer “stuck” to the top of the business card, the burgundy stripe on top was completely cut off.

The skew of the cut was ONLY ONE DEGREE.
In order for any smallest inaccuracies of the cut to be invisible and departures should be made.
The correct layout should look like this:

To make printed and cut business cards look like this:

To make the most of the capabilities of the printing house equipment when preparing the layout, pay attention to:
Quality digital printing and finishing
- Color accuracy
- Overall quality finished products
- Color registration quality
- Guillotine Cutting Accuracy
- Precision Plotter Cutting
- Creasing quality
- Folding quality
- Lamination quality
- Hot melt bond quality
- Digital technology is critical for printing uniform fills and gradients. If the necessary measures are not taken, more or less pronounced banding is observed. This becomes especially noticeable when the fill area is large and without any graphic elements. It is recommended to use various effects, for example "noise" (noise in Photoshop "e about 15%.) Fills of the highest quality are obtained with color densities from 0% to 30% and from 80% to 100%.
- The same problems arise when printing large areas with gradient fills. It is highly recommended to add “noise” or other texture to the image in such options.
- Thin graphic elements (less than 1pt) are recommended to be included only in vector form. Using bitmap formats (such as TIFF) for display
- For solid color text, we recommend minimum size font 4
- The minimum recommended line thickness is 0.25 pt, on inversions -
- The use of "balanced" gray (rendering of gray color by CMY ratio) is undesirable. It is better to apply Black percentage and, if necessary, tint it with CMY percentages.
- Our RIP allows color corrections during the printing process. If for some reason you are not satisfied with the signal print, and the color in the file seems correct to you, just write what changes in the base colors (by Cyan, Magenta, Yellow or Black) you want to apply to the print. For example, you can remove all over the Magenta image in highlights. The correction is applied in its entirety to the entire document, not to individual pages or images. Color correction on printing press in a large volume leads to an increase in production time.
- Additional (spot / Pantone) colors are printed by emulating them, consult us in advance to find out the REAL color, for example, we can provide an atlas Pantone colors printed on our machine according to Pantone certification.
- All transparencies, lenses, etc. must be converted to raster objects or Flatten Transparency technology must be applied to them, these objects require special control. Avoid intersection of transparencies / lenses and vector objects - this can lead to rasterization of the part of the vector object that is UNDER the transparency and, as a result, the two parts (UNDER and OUT of transparency) of the vector object will differ. Do not use spot / spot / Pantone colors in these effects - they will be converted to CMYK
- All color elements of the layout must be in the same color model (RGB - sRGB or CMYK - EuroOffset). Combined use of RGB and CMYK is allowed only in Adobe InDesign, when creating multi-page documents.
- Printing with a given screen line:
Production prints must comply with standard standards of optical density or an original sample (color proof) signed by the Customer.
The discrepancy between the signed sheet and the circulation should not exceed the standard for Xerox iGen3 printing equipment (delta E is not more than 5).
Automatic calibration of the printing press is carried out constantly in the process of work; calibration checks are carried out by the CMP operator daily.
There should be no mechanical damage (tearing of the edges, bottoming of ends, wrinkled and bent corners), fingerprints, oil stains, etc. on the circulation pages.
Images of all colors on the prints must be accurately registered.
Permissible deviations:
On paper with a density of 80 to 90 g / m² - up to 0.05 mm
On paper with a density of 90 to 130 g / m² - up to 0.01 mm
On paper with a density of 130 g / m² and above - 0.01 mm
Cutting error is no more than 1 mm
The minimum cutting length is 40 mm, in the production of products from one side of 40 mm or less - plotter cutting is used
Cutting error is no more than 0.5 mm
The product folds along the big lines without skewing, the big line is even, without holes
The error of drawing the big line is no more than 1mm
Permissible deviation of the ratio of the image and fold lines up to 2 mm, no more than 5% of the circulation
The laminate is pressed to paper / cardboard evenly without obvious wrinkles and bubbles, does not come off at the edges of the product without applying force. Deviations are allowed no more than 5% of the circulation. Slight delamination of the laminate is allowed in the places of internal scoring on a part of the run
The cover does not come off the block when shaken
Fine items can cause loss of quality. The minimum line thickness is 0.25 pt, for inversions - 0.5 pt.
0.5 pt. In the case of pouring with less than 95% of one of the separations, it is recommended to increase the line thickness by 1.5-2 times
- Standard screen ruling - 175lpi: produces better fills and gradients
- Additional ruling - 200lpi: fills and gradients will turn out worse, but the clarity of small and not 100% filled with paint elements will be higher.
- this value is not constant. Of course, there is a business card standard generally accepted in Russia, it is 90x50 mm.
However, there are customers who ask to make the format of the business card larger or smaller. Most likely, a departure from the standard size for them means a way to be original.
You can change the format, but for this you need to change all settings on the cutter twice, cut a non-standard set of business cards separately. All this takes a long time and not all printers agree to this. Those who agree demand for it additional fee, which is quite fair. It turns out to be quite expensive and often leads to imbalances.
It is clear when an order is made for euro-format business cards. This is the European standard for the size of a business card 85x55 mm. Specialists and individuals who travel on business or on vacation to European countries and are going to expand the circle of their acquaintances order euro-format business cards. Besides, international exhibitions and symposia held in Russia oblige our businessmen and scientists to acquire Business Cards of the Western format for foreign languages... When using some types of equipment, printing such products will require more consumption expensive design paper, which, accordingly, increases the cost and the final cost of euro-size business cards. Yet it is justified and cost effective.
It is still worth warning business people who try to stand out by changing the format business cards... The fact is that all business card holders and other specialized accessories for storing business cards are made for the Russian business card size in 9x5 cm. Smaller business cards simply fall out of the business card holders, and larger business cards cannot be placed in a small pocket. Thus, it turns out that it is more rational in all respects to order business cards of the standard Russian size 90x50 mm:
1. It's cheaper.
2. Your business card will be placed in a business card holder, and not put in a pocket or on a table, where it will get lost among many other things.

There is one more important aspect of this issue: business card designers working with two main dimensions 90x50mm and 85x55mm perfectly “feel” these dimensions and almost never problems with proportions. Non-standard business cards are often a little awkward precisely because of the unusual format of the card.
Polygrand company offers printing business cards both standard size and euro-format. The designers of our company will offer several options for the layout of the layout, and you will be satisfied with the quality and timing of the order. When making business cards, you can use the section.
Hello! Quite recently at ARTtime there was a small lesson, such a DEMO example for. But as one of the moss readers noticed, I did not write the requirements for layouts when printing in the printing industry. Well, today we will learn how to do this, but for one and beautiful business card cook up 😉
How to properly prepare a business card layout for printing
Before writing this article, I prepared well, found more than a dozen printing houses and sent them a letter asking them to provide me with the requirements for preparing a business card layout. Unfortunately, only two printers sent me instructions, thanks to them 😉 And the rest are assholes! In addition, I found a couple of instructions on the Internet, how can I do without it.
So, here are the basic rules for preparing a business card:
- First, the average business card size should be 98 by 58 mm... Then I'll tell you why not 90-50.
- The file resolution must be 300-600 dpi... DPI - this is the number of pixels per inch, a little further I will show you where to set it.
- Set the color mode CMYK, color profile CoatedFOGRA39
Here's a good example.

After we have created the document, we make a business card, but there are also rules here:

A little about the size of the business card
It means that we succeed, we created a layout with the size 98 by 58 mm... But keep in mind that the business card itself, or rather its content, must fit in the area 90 by 50 mm.In the diagram above, you can see a purple and turquoise field, between these fields there should be an indent in size 4 mm... Neither text nor graphic elements should fall into this area. Only the background should be taken out beyond the birch fields, this will be the cutting area.
It is also worth noting that when creating a business card, you should not apply any special effects to the font, except to a minimum. If the text is black, then it should be 100% black without any transitions. Also, you do not need to make bold text if it is small.
When everything is ready, you can save your business card in formats Tiff,Jpeg,PSD or vector PDF... Compression cannot be used when saving to JPEG. But I advise you to save in PSD... After that, you can safely go to the printing house.

Before creating a layout, I advise you to consult with the printing house, nevertheless, each has different equipment and standards, respectively. My recommendation will work for most printers.
Sly raccoons with a color printer can forget about all the rules and just create a beautiful business card to your taste. And I also note that a stack of business cards will be a good gift for loved ones for some holiday 😉
Have a great day!
If you want to make a themed business card, styling your business card in a vintage style is a good choice. In this tutorial, I will show you techniques that will help you achieve an interesting effect.
Let's start.
Step 1
We will start working on the business card by defining the parameters, taking into account the requirements for printing. Create new document by pressing CTRL + N. In the Image Properties Settings menu, enter the following values:
- Width - 3.5 inches
- Height - 2 inches.
- Resolution 300 ppi
- Color Mode: CMYK

Step 2
We have received a blank for a standard business card. Make a copy of the background layer ( CTRL +J).
The next step is to define the working area. The ruler will help us with this. To open the ruler, press the key combination CTRL + R.
Next, click with the mouse at the bottom of the upper scale of the ruler and drag the construction line to the top of the business card. After that, drag a guide line from the left ruler to the left edge of the business card. Repeat this step twice more and place construction lines on the right and bottom border of the business card.

Step 3
When working with business cards, do not forget about the "cropping" area.
Switch to Image> Canvas Size(Image> Canvass). Set new values for height and width: width(width) - 3,75
inches; height(height) - 2, 25
inches.

Step 4
If the text (and sometimes the image) comes close to the border of the business card, it doesn't look pretty. Now we will set the boundaries of the working area in which the main information will be placed.
The working area can be limited in several ways. For example:
- "Approximately". To do this, use a ruler (the technique from step # 2). Decrease the dimensions at the edges by 0.125 inches.
- Alternatively, you can enter clear parameters for construction lines. This will allow you to achieve a more accurate result. To enter new values, go to View> New construction line(View> New Guide).
Then set the following values:
- Top Margin: Horizontal - 0.25 inches
- Bottom Margin: Horizontal - 2 inches
- Left Margin: Vertical - 0.25 inches
- Right Margin: Vertical - 3.5 inches

Step 5
We have prepared a template for your business card! Now let's start developing the layout.
Go to the copy of the background layer. Activate the tool Gradient(Gradient tool) and use it to set the general color.
Note that you can always change the color scheme in the Gradient tool options bar by clicking on the gradient box. You can also look at all the gradient styles, experiment with their settings (icons next to the gradient color box).

Translator's note: the author used:gradient type - "Mirror"; colors - # c28c44 -# c5bb88 -# c28c44.
Step 6
It's time to add texture. I will use the texture of old paper in this work. You can use your own resources, or find suitable material in photo banks. When the texture is selected, drag it into your document, place it above all the previous layers.

Step 7
Standing on the textured paper layer, go to overlay mode layer (blend mode) and set it to Overlapping(Overlay). This simple trick will merge the texture with the overall color.

Step 8
Excellent! Now we have prepared the business card for the next stage - filling with content. Our first element will be the logo.
Well designed logo, add charm and more professional look any business card.
In this example, we will create a round logo with a sun shape.
Activate the tool Ellipse(Ellipse Tool). Create a new layer on top of the rest. Holding down the key Shift draw a circle. Choose the color of your choice.

Translator's note: the author uses the color # 211a26
Step 9
For further work we need to rasterize the circle shape we just drew. To do this, right-click on the circle layer and select " Rasterize a layer"(rasterize).

Step 10
It is necessary to add a symbol to the round base under the logo. You will of course have your own brand name, and for this example I will use a sun shape from the standard set.
Activate the tool Arbitrary figure(Custom Shape Tool). From the gallery of shape options (which is located above), select the appropriate sample. Add a new layer above the circle layer and draw the selected shape on it.

Step 11
Hold the key CTRL and click on the icon of the logo shape in the layer. This will create a selection.

Step 12
Go to the rasterized circle layer. Press the key without deselecting the selection. DELETE... Deselect the selection. Turn off the visibility of the logo shape layer.

Step 13
In my work, instead of the standard lines, I will use the dotted line, which will give a little retro style. Now I will show you how to do it.
Activate the tool Brush(Brush tool). From the set of brushes, choose a standard 5px round hard brush.

Step 14
Now, click on the brush panel icon. Switch to " Intervals"(shape subsection) Change the distance to 200%. This will turn the round brush into a series of dots.

Step 15
Create a new layer by clicking CTRL + SHIFT + N... Then, using the brush we just tweaked, draw a straight dashed line (hold down shift to make the line straight).

Step 16
Duplicate the resulting line several times. Arrange the stitches as you like.

Step 17
Let's add some more additional lines for the design. Reduce the brush size to 3 px and paint the lines at the top and bottom of the business card.

Step 18
Let's create an accent on the bottom of the informative part of the business card.
To do this, activate the tool Rounded rectangle(Rounded Rectangle Tool) and draw a rectangle shape in the area of the lower small lines.

Step 19
Excellent! Now let's just add our text. We use several different retro fonts that can be downloaded from dafont.com.

Step 20
Moving on to the final details! Select all layers. Right click in the Layers panel and from the submenu select " Merge layers"(Merge layers).
Translator's note: I recommend that you do not merge all layers at once. For further actions, it will be more convenient to make the mix as follows: select the layers with the logo and lines - and merge them. Next, select the text layers and merge them. You should have three layers: a text layer, with a logo and lines, and a background layer.

Step 21
Download any vintage or grunge brushes you like and decorate your business card. You can use this site to download the brushes you need.
Translator's note: The author used the Eraser tool. A grunge brush was selected in the tool settings. A nice effect can be achieved by adding a layer mask to the layer with the logo (text) and using the grunge brushes on the layer mask (color black).

Step 22
Change the Blend Mode of the Vintage Patterns and Information Layers to Darkening the base(Color burn).
Translator's note: If you followed the advice from step 20, then you need to change the blending mode for three layers: with a vintage pattern, with text, with a logo + lines.

Step 23
Finishing touch. Duplicate the information layer, this will give expressiveness to the main part.

We have finished the lesson. The effects that you have learned to do can be safely applied to the design of posters, flyers or postcards.
If you want to make a themed business card, styling your business card in a vintage style is a good choice. In this tutorial, I will show you techniques that will help you achieve an interesting effect.
Let's start.
Step 1
We will start working on the business card by defining the parameters, taking into account the requirements for printing. Create a new document by pressing CTRL + N. In the Image Properties Settings menu, enter the following values:
- Width - 3.5 inches
- Height - 2 inches.
- Resolution 300 ppi
- Color Mode: CMYK
Step 2
We have received a blank for a standard business card. Make a copy of the background layer ( CTRL +J).
The next step is to define the working area. The ruler will help us with this. To open the ruler, press the key combination CTRL + R.
Next, click with the mouse at the bottom of the upper scale of the ruler and drag the construction line to the top of the business card. After that, drag a guide line from the left ruler to the left edge of the business card. Repeat this step twice more and place construction lines on the right and bottom border of the business card.
Step 3
When working with business cards, do not forget about the "cropping" area.
Switch to Image> Canvas Size(Image> Canvass). Set new values for height and width: width(width) - 3,75
inches; height(height) - 2, 25
inches.
Step 4
If the text (and sometimes the image) comes close to the border of the business card, it doesn't look pretty. Now we will set the boundaries of the working area in which the main information will be placed.
The working area can be limited in several ways. For example:
- "Approximately". To do this, use a ruler (the technique from step # 2). Decrease the dimensions at the edges by 0.125 inches.
- Alternatively, you can enter clear parameters for construction lines. This will allow you to achieve a more accurate result. To enter new values, go to View> New construction line(View> New Guide).
Then set the following values:
- Top Margin: Horizontal - 0.25 inches
- Bottom Margin: Horizontal - 2 inches
- Left Margin: Vertical - 0.25 inches
- Right Margin: Vertical - 3.5 inches
Step 5
We have prepared a template for your business card! Now let's start developing the layout.
Go to the copy of the background layer. Activate the tool Gradient(Gradient tool) and use it to set the general color.
Note that you can always change the color scheme in the Gradient tool options bar by clicking on the gradient box. You can also look at all the gradient styles, experiment with their settings (icons next to the gradient color box).
Translator's note: the author used:gradient type - "Mirror"; colors - # c28c44 -# c5bb88 -# c28c44.
Step 6
It's time to add texture. I will use the texture of old paper in this work. You can use your own resources, or find suitable material in photo banks. When the texture is selected, drag it into your document, place it above all the previous layers.
Step 7
Standing on the textured paper layer, go to overlay mode layer (blend mode) and set it to Overlapping(Overlay). This simple trick will merge the texture with the overall color.
Step 8
Excellent! Now we have prepared the business card for the next stage - filling with content. Our first element will be the logo.
A well-designed logo will add charm and a more professional look to any business card.
In this example, we will create a round logo with a sun shape.
Activate the tool Ellipse(Ellipse Tool). Create a new layer on top of the rest. Holding down the key Shift draw a circle. Choose the color of your choice.
Translator's note: the author uses the color # 211a26
Step 9
For further work we need to rasterize the circle shape we just drew. To do this, right-click on the circle layer and select " Rasterize a layer"(rasterize).
Step 10
It is necessary to add a symbol to the round base under the logo. You will of course have your own brand name, and for this example I will use a sun shape from the standard set.
Activate the tool Arbitrary figure(Custom Shape Tool). From the gallery of shape options (which is located above), select the appropriate sample. Add a new layer above the circle layer and draw the selected shape on it.
Step 11
Hold the key CTRL and click on the icon of the logo shape in the layer. This will create a selection.
Step 12
Go to the rasterized circle layer. Press the key without deselecting the selection. DELETE... Deselect the selection. Turn off the visibility of the logo shape layer.
Step 13
In my work, instead of the standard lines, I will use the dotted line, which will give a little retro style. Now I will show you how to do it.
Activate the tool Brush(Brush tool). From the set of brushes, choose a standard 5px round hard brush.
Step 14
Now, click on the brush panel icon. Switch to " Intervals"(shape subsection) Change the distance to 200%. This will turn the round brush into a series of dots.
Step 15
Create a new layer by clicking CTRL + SHIFT + N... Then, using the brush we just tweaked, draw a straight dashed line (hold down shift to make the line straight).
Step 16
Duplicate the resulting line several times. Arrange the stitches as you like.
Step 17
Let's add some more additional lines for the design. Reduce the brush size to 3 px and paint the lines at the top and bottom of the business card.
Step 18
Let's create an accent on the bottom of the informative part of the business card.
To do this, activate the tool Rounded rectangle(Rounded Rectangle Tool) and draw a rectangle shape in the area of the lower small lines.
Step 19
Excellent! Now let's just add our text. We use several different retro fonts that can be downloaded from dafont.com.
Step 20
Moving on to the final details! Select all layers. Right click in the Layers panel and from the submenu select " Merge layers"(Merge layers).
Translator's note: I recommend that you do not merge all layers at once. For further actions, it will be more convenient to make the mix as follows: select the layers with the logo and lines - and merge them. Next, select the text layers and merge them. You should have three layers: a text layer, with a logo and lines, and a background layer.
Step 21
Download any vintage or grunge brushes you like and decorate your business card. You can use this site to download the brushes you need.
Translator's note: The author used the Eraser tool. A grunge brush was selected in the tool settings. A nice effect can be achieved by adding a layer mask to the layer with the logo (text) and using the grunge brushes on the layer mask (color black).
Step 22
Change the Blend Mode of the Vintage Patterns and Information Layers to Darkening the base(Color burn).
Translator's note: If you followed the advice from step 20, then you need to change the blending mode for three layers: with a vintage pattern, with text, with a logo + lines.
Step 23
Finishing touch. Duplicate the information layer, this will give expressiveness to the main part.
We have finished the lesson. The effects that you have learned to do can be safely applied to the design of posters, flyers or postcards.
 The fastest boat in the world!
 The history of the Off-White brand
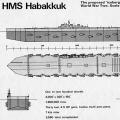 Habakkuk: how the British tried to build an aircraft carrier from ice Why the project was curtailed