How to create interactive flash presentations. Flash presentation creation. Creating a new project
Outline plan
Master classes in informatics on the topic:
“Flash-presentation as a tool for creating a“ Portfolio ”.
Item:
"Computer science"
Audience:
subject teachers, informatics teachers
Teacher:
Bazhenov Alexander Sergeevich
Lesson objectives:
Educational:
Learning new knowledge on the topic "Flash-presentation as a tool for creating a" Portfolio ";
practicing the skills of creating presentation objects;
formation and development of information competencies.
Developing:
development of students' creative abilities;
development of skills for transferring theoretical knowledge to practical activities.
Educational:
development of a general information culture of students;
development of skills of mutual assessment and self-assessment of activities.
Lesson type: a lesson in gaining new knowledge on the topic.
Lesson form:
workshop lesson.
Equipment:
screen, multimedia projector, computer, Flash presentation
Software
Adobe Flash CS4
Introduction
Dear listeners of the master class!
Often, when developing presentations, it becomes necessary to find a variety of solutions. Today great attention paid to the portfolio. Many imagine him in the usual paper form, others create a whole electronic library portal, website, etc. Today I will show you just one of the ways to create a portfolio using the example of creating a simple Flash presentation.
Basic principles of creating a presentation
* It is very important that your presentation has a coherent, finished look. Consider a structure and sequence of slides that should accurately complement your speech. Remember that quantity does not always determine quality.
* After creating the structure, work out the common design elements for all slide pages of the presentation.
* Then move on to filling with content - working out individual slides and programming reactions to mouse actions using Action Script.
* Pay special attention to testing. Do not forget that you are not dealing with debugged templates, but with the living result of your creative activity.
* Here are some more tips to help keep viewers interested in your presentation.
* Avoid heavy content on the page - you are not having a reading lesson, but a presentation, so instead of words it is better to place an illustration or visual diagram or diagram.
* You should not completely abandon the text that explains the pictures, because you can quickly get tired of an excessive number of complex schemes and graphs.
* Do not overload the work with a large number of spectacular effects, everything should be done with taste, with a sense of proportion and in line with the main idea of the presentation. Excessive diversity is annoying, and the audience, forced to helplessly follow the chaotic flashing before their eyes, will not understand what you want to explain to them.
Ways to create a presentation in Flash
http://s3.directupload.net/images/100330/zdbx55yc.jpg
A presentation can be done in two ways.
Method 1.
Take a standard Flash presentation as a basis. To do this, open the template file using the File - New menu, select the Template tab in the dialog box and check the Presentations item, and then give preference to one of the standard templates.
Method 2. Create your own presentation starting from scratch. We will go the second way as the most interesting and allowing to make a presentation.
Presentation creation
STEP 1
1. Create new document.
http://s3.directupload.net/images/100330/v589lvv5.jpg
2. Configure its properties. To do this, on the Properties panel, specify the following parameters: Frame Rate - 15 fps (default is 12), select a background color. The first (bottom) layer, which serves as the "background", will have a design common to the entire sequence of slides.
To make it easier for you to work, turn on the rulers View - Rulers and the grid View - Grid - Show Grid (View - Grid - Show Grid). These elements are needed to accurately place objects on the working area.
STEP 2
http://s3.directupload.net/images/100330/ej5io5om.jpg
In the toolbar, select the rectangle, select the red color.  Draw a rectangle about the size of the future button. Without releasing the mouse button, press the down arrow key. This will give you rounded edges. Hold the DOWN ARROW KEY until the corners turn into semicircles, ie. to the maximum roundness of the rectangle.
Delete the path - double click on the path to select and press the Delete key
STEP 3
http://s5.directupload.net/images/100330/nhtzwnbo.jpg Create 2 more buttons, one below the other in green and blue.  Use the text tool to add labels. In order for the buttons to be the same, try to copy the first button (Ctrl + C) and paste in the middle (Ctrl + V).
STEP 4
Selection tool  select the area of the first button.
  Press F8 and name the button red.
  Do the same for the green button and the blue button, giving them the names green and blue, respectively.
STEP 5
Create a new layer  and rename it by double clicking on its name in pages.

 Add any text to the page Draw a red page with the rectangular primitive tool.
STEP 6
 At frame 10 on the pages layer, press F6 and change the page color to green. Go to frame 20 and press F6 and change the page color to blue. Go to frame 30 and press F5. Add any text to your pages.
  Rename layer 1 main. Highlight frame 30 and press F5. Create a new layer and name it lables
STEP 7
At frame 10 and at frame 20 on the lables layer, press F6. Go back 1 frame and name the frame red 
On frame 10, name the frame green, and on frame 20, name the frame blue. 
Create a new layer and name it actions.
STEP 8
Go to frame 1 of the main layer and name the buttons: 
red_btn for the red button, green_btn, blue_btn for the green and blue buttons, respectively.
Go 1 frame on the actions layer. Press F9.
STEP 9
Add the following code 
Test your presentation by pressing Ctrl + Enter.
Full text of the material Master class. For creating a presentation in Flash, see the download file.
The page shows a snippet.
A bit of history Flash-presentations began to spread with the advent of the flash-player and flash-products in general. Flash software allowing the development of interactive multimedia applications. Flash is used in a variety of ways, including games, websites, CD presentations, banners, and just cartoons. When creating a product, you can use media, sound and graphic files, you can create interactive interfaces and full-fledged web applications using PHP and XML. cartoons gamesPHP cartoons gamesPHP Flash Player is a player of files created in Flash format.

Flash Presentations are a hybrid of Web Show and Video File. Presentations in this format are created for viewing on a web page, but are based on video. Unlike the restrictions on regular video files, Flash presentations support displaying menus and multiple presentations. Flash presentations, however, do not support color profiles. The quality of the Flash presentation is noticeably lower than the Web Show because the video requires much more bandwidth. This limits overall quality presentation. The real advantage of Flash presentations is high compatibility. Most Internet users there is a Flash plugin already installed for their browser, and it is very easy to play a presentation made with Flash.


Types of FLASH-presentation: Advertising colorful story in a favorable light about any product; Gift Edition - a video created for partners, visitors, bosses, etc. and telling about the activities of the company. Usually it is created for some kind of anniversary - as a visual, concentrated display of successes and achievements. Catalog of goods and services - a multimedia, colorful display of the company's goods and services with the necessary comments, accents, etc. It has a much stronger effect than showing a standard printed product catalog. Used by staff when working with clients. Exhibition catalog - a multimedia display of exhibits and the benefits of their use, a story to manufacturing companies, etc. Electronic report Flash video about any event, report on the work of the company, etc. It can be used either as an accompaniment to the report or independently. An electronic business card is in many ways similar to a gift publication about a company. It is a multimedia presentation of the company.

Use in advertising Presentation is a very effective tool for promoting a company, goods and services. Unlike short advertising messages, a presentation allows you to convey to your audience a large amount of information in an easy-to-understand form. Until recently, MS presentations were considered the standard. Power point... However, flash technologies make it possible to turn ordinary graphics, diagrams, photographs and text blocks into an interactive film with animation elements and precisely selected sound design. A flash presentation can contain interactive tools (for example, games), it can contain several sections, from which the user will choose only those that are of interest to him. Such a video makes an incomparably greater impression on the viewer, at the same time providing him with detailed information and affecting emotions uses Newest technologies to develop your business

Areas of using flash presentations - a story about a company, significant events in the development of your business - a description of the advantages of a new product or service - informing about a special action - an illustration commercial proposal, report - appeal to clients, partners, colleagues - demonstration in sales offices, at exhibition stands, presentations - recording of presentation CDs that can be - used for distribution among the company's audience and as attachments to magazines or media kit


Basic principles of creating a presentation * Must have a solid, finished look. A well-thought-out structure and sequence of slides that accurately complement your speech. * After creating the structure, work out the common design elements for all slide pages of the presentation. * Then move on to filling with content. * Pay special attention to testing. Do not forget that you are not dealing with debugged templates, but with the living result of your creative activity. Here are some more tips to help keep viewers interested in your presentation * Avoid the heavy content of the page, not a reading lesson, but a presentation, so instead of words it is better to place an illustration or visual diagram or diagram. * You should not completely abandon the text that explains the pictures, because you can quickly get tired of an excessive number of complex schemes and graphs. * Do not overload the work with a large number of spectacular effects, everything should be done with taste, with a sense of proportion and in line with the main idea of the presentation. Excessive variegation is annoying.


Many marketers use desktop applications such as PowerPoint to create videos and presentations. However, they do not like to experiment with animation and prefer to do everything the old fashioned way.
Perhaps this is due to the likelihood of technical problems. However, animated presentations are much more engaging than classic ones, making it easier to convey complex concepts. Another plus is that they are better remembered.
To create animated videos and presentations, you don't need to own professional programs such as 3D Studio Max, Maya or Adobe After Effects. It is much easier to use straightforward online services.
The presentations created in them are easy to share online, they can also be downloaded as a video file that can be played without problems on any computers and mobile devices.
How to make a video presentation fun and effective, we talk about in the article ““.
Below, we highlight the 5 best online services for creating animated presentations.
1. GOANIMATE
It doesn't matter if you are confident using your computer or are still getting lost at the sight of the Windows navigation menu. If you know how to use a mouse and keyboard, then easily create a professional animated presentation in GoAnimate.
This service allows you to create videos using ready-made templates, background music and animated characters.
GoAnimate is a lot like PowerPoint. The tool can be used to create short videos, marketing demos, videos for YouTube channel and of course animated presentations with interesting characters and branding elements.
https://youtu.be/9S3FlqB4-gs
Finished projects can be downloaded, uploaded to YouTube or another program for preparing presentations. To use GoAnimate, you need to subscribe to a paid subscription for at least a month. A free demo version for 14 days is also available.
2. WIDEO

All sections of the site site
flash sites, creation of flash presentation Flash intros
Flash animation on the site
Flash technologies that are eye-catching ...
Flash Is a modern, popular technology in the field of animation and multimedia. Flush- it is original and dynamic . Sites (presentations or just banners) created with flash become interactive.
Flash technologies brought interactivity, showiness and attractiveness of multimedia applications to the Internet. The Internet came alive with animations, videos and sounds
Flash screensavers for sites
Flash splash - this is a short animated film , briefly telling the visitor about the content of the website. If the site is implemented in several languages, at the end of the video, the visitor, as a rule, is given the opportunity to choose a version of the site in one of the languages.
Flash intro can be used - this is a great opportunity to concisely and in color, through the wonderful possibilities of modern internet technologies, Macromedia Flash, tell the visitor of your office about the capabilities of your company or the specifics of your business, even before he gets to the internal pages of your site.
Flash screensavers are an integral part of the promotion of your website on the Internet. On many sites, on the Internet, you can see flash-screensavers reflecting the direction of the company's activity.
Convenient technology for presenting information helps to correctly, and most importantly, in a beautiful and intelligible form, to convey the main idea, which is sometimes beyond the power of large web sites.
The duration of the flash saver varies from a few seconds to several minutes. For flash screensavers you can use the speaker's voice. After all, what the guest of your web project focuses on first of all is design.
That is why it is important to make a positive effect on guests from the first minutes. . As the construction of a house begins with the first brick, so the effect of the first acquaintance of the clients of the site (they are met by their clothes) with your organization begins with the design.
Flash presentation
Flash presentation is one of the most effective advertising technologies today. Flash presentation - important element corporate style that allows you to make good impression and indicative of your serious approach.
At the heart of Flash presentation- animation and Flash technology. Flash presentation is an interactive film , which in a short time allows you to most effectively convey the essence of the issue to the client or partners. Today Flash technology is very popular, with its use are developed interactive applications, presentations and websites.
If you need to create a unique impression, then when preparing web sites, it is possible to implement the latest achievements in the field of computer graphics, for example, such as flash-multimedia, which allows you to make very beautiful graphics and bring dynamics to the page.
Flash sites
But flash screensaver on the first page of the site - not at all required condition when creating a web resource that can have completely different goals, features, methods of influencing the visitor, in some cases, instead of flash-intro on the main page, flash elements, as a design tool, can be scattered over the internal pages of your site.
And they will serve the assigned tasks no worse, and in some cases perform exclusively decorative functions.
Flash sites are not intended for posting as much information as on html-sites, but using Flash technology, this information will look much brighter, which contributes to greater impact.
For Internet users, the level of a company's website is an indicator of the development of the company itself and its products.
Flash sites give the impression of interesting and complex products. Information about new and original Flash sites spreads rapidly across the web, causing an influx of visitors to your site.
The development and implementation of a Flash site has a number of advantages over static sites:
At first, Flash site- implies interactivity (not only the user communicates with the site, but the site also responds to him, the site elements are rebuilt depending on the user's actions);
secondly, the Flash site is dynamic, which facilitates the assimilation of information; thirdly, the Flash site is simply more interesting - to click here and there, observing the changes.
Flash technology allows you to host almost any multimedia format (video, sound, vector graphics and etc.).
Flash site enhances the image status of the company. The creation of a Flash site speaks of the modern views of the company and a serious attitude towards their own image.
Flash galleries
Flash- just a great technology that allows you to make web sites not only look great, but also create a feeling of comfort and convenience for the visitors.
Animated buttons or other elements of the site catch the eye of visitors and their attention more than the usual stationary elements of the site. But in this, too, there must undoubtedly be a reasonable measure.
It is not at all necessary to create bloated and "heavy" by the standards of the Internet flash objects, a light, small creative presentation is quite enough, and the visitor will always find out the "details" on your site, the main thing is to captivate the viewer without bothering him from the very beginning with unnecessary details.
![]()

Learning to make games, presentations, etc. in Flash
What about what?
I have no doubt that you have probably seen a lot of banners (animated advertisements), Flash games on the Internet. As you might guess, all this is done in Flash.
What you need:
- A wish
- Straight arms
- Flash itself (starting from the 6th version)
The basics
General terminology
Below is a table providing an understanding of the terms that will be used below.
| Term | Title in editor | Description |
|---|---|---|
| Frame / Frame | Frame | It's just a shot. Frames are divided into Key frames and regular frames. |
| Key frame | Key frame | A frame containing any image or objects. From the sequence of keyframes, the animation is composed. |
| Timeline | Time scale | Top panel *. Contains all frames in the document. |
| Toolbar | Tools | The panel on the left. Contains tools for drawing and selection. |
| Action bar | Actions | The panel at the bottom. Contains an editor for Action Script code. |
| Parameters panel | Properties & Parameters | The panel at the bottom, below the action panel. Contains the properties of the selected object or document as a whole. |
| Script / Action script | Action Script | Flash movies programming language. Required for games and applications. It is also used to control the progress of the presentation. |
| Working field | The field that is in the center of the document when it is opened. It has a rectangular shape and the background color selected in the options bar. Determines the visible area of the document at the time of display. | |
| Preview | Preview | The debug mode of the document is necessary for viewing "what happened" and finding errors. Called by pressing the keyboard shortcut Ctrl + Enter |
Interface
A visual display of the listed in the table.
Creating a new project
- Subsequence:
- File ->
- New (New Flash Document)
- We will immediately save it under some name: to save, execute the keyboard shortcut Ctrl + S ( always save the file when making important changes, it is also recommended to keep backups)
Project created
Animation creation
- First, let's create a new project.
- Now let's take a look at a simple example of creating a stop-motion animation:
- select the tool "Brush" (Brush);
- draw something in the center of the work area;
- press F6 to create a new keyframe. New frame will appear on the timeline, and you will automatically move to it;
- as you can see, nothing has changed in the new frame. Select the "Selection Tool";
- select the object you have drawn with the tool, and then, holding the left mouse button, move it a short distance from the initial position;
- repeat steps 3, 4, and 6 until you are satisfied with the result;
- now, to see the work done, arrange a preview by pressing Ctrl + Enter;
- watch :)
Output: animation is just a sequence of keyframes, they are easy to create and easy to edit. It is not necessary to move the picture, you can also change it, i.e. paint something else, erase, change shape, color, etc. The content of any frame is completely at your disposal ... Attention! Your cartoon is limited only by your imagination!
Writing a script for a frame
- You probably noticed that when watching a cartoon, when the animation reaches the last frame, everything starts all over again? This is because, according to the standard, there is no "stop" command at the last block. So let's write it:
- go to the last frame by clicking on it with the mouse (on the timeline);
- now click on the action bar to expand it;
- write: stop ();- this will make the animation stop at the last frame;
- check it out by running the preview.
About "scripts in frames": commands written in this way will only work during the transition to the frame in which they are contained.
Creating a button
- Let's draw something in the center of the working area with a brush:
- on the toolbar (left) select "Brush" (Brush);
- in the center of the working area, draw something button-like.
- Now let's transform the resulting image into a button:
- highlight your drawing;
- press F8;
- in the window that opens, select "Button";
- click "OK".
The button is created!
Writing a script for a button
- The script will be assigned to the button (how to create it is written above):
- select your button (a blue frame should appear around it);
- go to the action bar;
- in the text input field enter:
- Let's analyze what is written here:
- on (press) // when the button is pressed (press in brackets means that the action will start the moment the button is pressed. But there are many other events, for example, release - if you put it instead of press, then the action will start when the button is pressed, and then they will release, i.e. when released);
- { // open parenthesis marks the beginning of the action list;
- stop (); // stop playback (if we wanted, on the contrary, to continue playback, then instead of stop (); would write play ();)
- } // close the action list.
As a result, when the button is pressed, the animation stops at the current frame.
List of basic commands (actions) to control playback
Create an interactive presentation
Create playback controls
Create a navigation bar for a presentation or cartoon
- For work we need:
- "Skip forward" button;
- Pause button;
- button "Next frame";
- Previous Frame button.
Where can I get them? Nowhere. We will do it ourselves - you and me.
Progress
- Draw some objects.
- Convert each object to a button as described above.
- Assign your action (script) to each button according to the sample.
- For the Next Frame and Previous Frame buttons, add the following actions: nextFrame ();(for the Next Frame button) and prevFrame ();(for the "Previous frame" button)
Moving the panel to a separate layer
If there is no animation or presentation frames yet
For convenience:
![]()
Locking a layer
- click on the "Lock Layer" button, as shown in the picture;
- add a new layer. It will host the animation or slides of your presentation;
- on the timeline, click on the first frame of the new layer to go to it.
If you have already created your presentation or animation
- Select your entire panel with control buttons.
- Execute the keyboard shortcut Ctrl + X (to cut the panel for subsequent insertion).
- On the timeline, click on the first frame of the new layer to go to it.
- Add a new layer. It will host the control panel.
- Go to the first frame of the new layer.
- Execute the keyboard shortcut Ctrl + V (to paste the panel on a new layer).
- Now scroll through the frames in the timeline to the last frame of the animation / presentation.
- Select the frame of the new layer at the same position (as in the picture) and press F6.
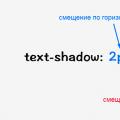 Creating Text Effects Using CSS3 Decoration Line Style: The text-decoration-style property
 Railway waybill reverse side Filling in the railway waybill
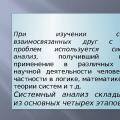 Systems analysis in modern management