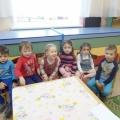
Relief modeling from plasticine on cardboard. Do-it-yourself plasticine painting. Photo gallery: collective work of children of the preparatory group for the "Autumn" project
Perhaps it is impossible to find such a child who would not like to sculpt from plasticine. Soft and malleable, it can take any shape, unlike other types of creativity (drawing, applique), a failed plasticine craft is easy to fix. Such qualities attract children, so they are happy to do sculpting. On sale you can find any kind of plastic material for home creativity and organize independent studies for your child. Both adults and children are happy! Meanwhile, not all parents know that they can also draw with plasticine, creating three-dimensional paintings. This type of activity is called plasticinography.
What does the concept of plasticineography include? This unconventional drawing technique is a new direction of children's creativity, when a molded volumetric picture is created on a plane. An unusual way of drawing is a fun activity not only for children, but also for adults. Teachers advise parents by all means to learn unusual pictorial techniques themselves and to teach their child, since the goal of plasticineography is not only to develop the creative abilities of children, but also to expand knowledge about the world around them, to form intelligence, to develop mental processes, to actively influence the development of fine motor skills. Such creative activities with children are easy to organize at home. The main thing is that parents themselves should be interested in plasticineography, then the child will be carried away by this type of creativity.
We get acquainted with the secrets of plasticine technique
 What are the secrets of plasticineography, is it possible to teach them to children? Teachers confidently say that this technique is quite accessible to preschoolers, and with the right approach, plasticineography as a means of developing children's creative abilities can become a serious support for family education. In order not to miss the moment, it would be nice for parents to know when they start creating stucco paintings with babies. According to experts, such classes can be carried out with three-year-old children. The main thing when creating paintings from plasticine is to take into account the age of the child and his technical skills, since due to the complexity of the image, interest in creativity can be lost. Therefore, the kids are first introduced to the simplest techniques of the "molding alphabet":
- Smudge
- the most simplified plasticine technique available to even the smallest child. Plasticine is smeared with fingers on the finished smooth base.
- Rolling out - the method of work increasing in complexity. It requires certain muscular efforts, since the plasticine is rolled out with straight arm movements in the form of a cylinder or in circular movements in the form of a ball.
- Flattening and pulling - the most important stages in the creation of stucco paintings. They are necessary for the image of various decorative and applied forms, for example, a flat cake, a heart, an oval or an elongated cylinder, a flagellum. To do this, first roll out a ball or sausage, and then squeeze it with your palms, transferring various bends, grooves or an elongated tip with your fingers.
The subjects of pictures for preschoolers at this age can be well-known autumn and summer motives, for example, "The Sun" (flatten the yellow ball on a blue background, and apply the rays around); "Flowers on the Grass" (smear green plasticine on a smooth base, apply flattened multi-colored balls on top). Similarly, "Autumn leaves on the ground", "Falling snow", "Hedgehog", "Colorful fireworks", "Garlands on a Christmas tree" are decoratively depicted. Educators advise be sure to use rhymes, riddles and small stories about stucco painting to maintain interest in creativity and encourage the child, for example:
 I blind the sky, sun, trickle from plasticine,
I'll stick flowers everywhere, draw a cornflower.
And daisies, forget-me-nots, baby buttercups
They will smile at the sun, enjoy the warm summer!
We made koloboks
Flattened them from the sides.
It turned out to be a pancake,
Very soft (plasticine).
Important: working with plasticine is a rather difficult task for fragile children's fingers. Therefore, firstly, plasticine for plasticineography must meet the necessary requirements (heat the solid mass in warm water); secondly, during the creation of a stucco picture, it is necessary to change the types of activities, pausing to prevent overwork of the baby.
Technique for senior preschoolers
When the simplest methods are mastered by children, they move on to a more complex stage of training, show new techniques and a variety of plasticineography. Thus, a certain system of work on the picture is created. What methods of plasticineography are characteristic of this particular technique?
- Smoothing - the reception is necessary to prepare the basis for the future picture. To get a smooth surface, you need to gently smooth out the layer of plasticine with your fingertips. You can moisten your fingers with water, then things will go faster. The work requires certain muscular efforts, therefore it is available only to older preschool children.
- Topping - used to create new details in the picture and give it a decorative effect. The preschooler pinches the clay with his fingers where it is necessary to decorate the image.
- Smearing, pressing - techniques are necessary for the tight attachment of the elements of the picture.
- Sticking- connects one part of the image to another or helps to apply the necessary details to an already finished drawing, photograph.
- Mixing different colors of plasticine to obtain shades - necessary for painting decoration. Children are taught to knead colored balls in one piece or mix different colors right in the outline of the drawing in the form of neatly overlaying one colored piece on top of another.
To give more expressiveness to plasticine paintings, it is good to use elements of natural material: leaves, shells, nuts, seeds, small pebbles, bean grains, etc. Beads, beads, small buttons in decorating images will look beautiful.
Important: plasticineography as a means of developing fine motor skills of hands involves a gradual transition from simple ways of working to more complex ones. Then the preschooler will be able to prepare the composition for a long time without getting tired. And the system of techniques for working with plastic materials mastered by the child will help new ideas and creative finds appear.
For older preschoolers, the plots of the paintings can become more complex than those of toddlers, compositions on the themes of the seasons, for example, "Snow is Falling", "Butterflies in the Meadow", "Basket with Mushrooms", "Still Life of Fruits", "Vase with Wildflowers "," Rainbow and Rain ". Children like to create pictures from the life of animals ("The inhabitants of the zoo", "Hedgehog with mushrooms", "A dog plays with a ball", "Kitten and a ball"), from the life of people ("Holiday", "Space", "Children sculpt a snow woman ") or fairy-tale characters. They can compose small funny rhymes and stories themselves to play with their crafts:
I sculpt from plasticine
Ball, ball and penguin.
But this is a hippo
He has a big tummy.
Plasticine ears
Wiggle on top of the head
Important: Parents! Do not forget to rejoice with your children in each of their creative discoveries. Try to save crafts for a long time, give them to loved ones, friends, to give meaning to children's creations.
Plasticine method
To make it easy for parents to organize teaching children at home, specialists have developed a method of plasticineography for children, which involves the following step-by-step work:

- First, we teach younger preschoolers to knead plasticine until it becomes pliable.
- We offer the kids a ready-made base or ask for a little help in its preparation, for example, create a contour with an adult.
- We teach older children to prepare the basis of the paintings, who already have the skill of working with stucco material. Correcting the movement of the hand when smearing the plasticine from the center to the edges.
- We offer little children no more than two techniques for making simple images. The elders perform decoratively complex paintings using a whole range of techniques.
- To get a new color shade for a drawing, even young children are taught to combine different colors of plasticine, for example: yellow and red for orange, blue and yellow for emerald, blue and white for light blue.
- We show older preschoolers that strokes can look like silk, glass or ceramics, be rough or embossed.
- To roughen the details, we use various methods with the help of a stack: we apply relief dots, strokes, stripes, curly lines. To depict thin plasticine threads, plastic syringes without needles will be indispensable.
- Teach children that it is best to use bright, soft material in drawing to give the image an interesting shape.
How to properly prepare materials for creating plasticine paintings
- To give the picture stability and avoid deformation, use only thick cardboard for the base of the picture.
- To avoid the appearance of untidy plasticine spots on the basis of the pattern, cover it with adhesive film.
- To avoid mistakes in the sculpting process, first apply the outline of the drawing on the cardboard under the film.
- To prevent the painting from deteriorating for a long time, cover it with a colorless varnish.
- In order to work on the painting quickly, prepare the necessary materials in advance: cardboard, contours of drawings, plasticine, napkins for hands, stacks, toothpicks, a set of natural materials, a modeling board.
What is plasticineography
 Teachers, teaching preschool children, use various types of plasticineography, which are easy to organize at home. Parents need to know what and how is used at different ages. All preschoolers will have access to direct plasticinography
, in which a stucco image is built on a flat surface. When making a picture, you first need to roll up volumetric forms, for example, koloboks, sausages, then arrange them along the contour and flatten them in accordance with the plan, well attaching the details.
Teachers, teaching preschool children, use various types of plasticineography, which are easy to organize at home. Parents need to know what and how is used at different ages. All preschoolers will have access to direct plasticinography
, in which a stucco image is built on a flat surface. When making a picture, you first need to roll up volumetric forms, for example, koloboks, sausages, then arrange them along the contour and flatten them in accordance with the plan, well attaching the details.
Kids easily master this technique at the age of two or three. They are offered an unpretentious drawing without small details, at the initial stage with a ready-made base. Older guys create more complex compositions. They independently prepare the base, complete a contour, which is gradually filled with softened plasticine.
Back plasticine (stained glass) involves painting on the back of the base. To do this, it must be transparent, for example, plastic or plexiglass. The drawing is drawn up on the basis of a marker, and then its elements are filled with plasticine. Pieces of plasticine of the required size and color are selected into the image, softened, and then smeared on a transparent base. To get a thin neat layer, you can smear it with your fingers or a stack, carefully pressing the plasticine to the surface.
Modular plasticinography belongs to a complex technique and requires from preschool children the ability to master all the techniques of modeling. Then a stucco picture is obtained, consisting of various decorating elements: balls, cakes, cylinders, braids and other technical elements.
Mosaic plasticinography - a technique loved by children, since the image is composed only of plasticine balls. A fairly simple technique is available to children of all ages. The main thing is to select the appropriate colors and carefully fill the contour space with elements, without going beyond it. The method of work consists of rolling small balls, placing them on the base and pressing against it.
Contour plasticinography - involves sculpting an object along the contour. Step by step, the steps of the action will be as follows: first, a drawing is applied to the base with a marker, then a contour is laid out with the help of thin rolled flagella, the image is filled with flagella of the corresponding color. Educators advise using a large syringe without a needle, into which plasticine is placed, then the syringe is placed in hot water to soften. Thus, you can get beautiful, even flagella.
Multilayer plasticinography - represents sequentially applied layers of plasticine on the base. A similar technique is necessary for landscapes: images of a forest, water, field, when you need to choose not only the primary colors, but also their shades. Such work is quite difficult for young preschoolers, and it is appropriate to carry it out only with older children. The method of work is as follows: different colors of plasticine are selected, from which thin cakes are made. Then the blanks are stacked on top of each other in the form of a multi-layer cake in accordance with the pattern.
 Textured plasticinography
- the most difficult technique, as it involves the production of a three-dimensional image. It can be distinguished bas-relief
(fr. bas-relief - low relief, the volume of the figure is less than half), high relief
(protruding more than half) and counter-relief
(Latin contra - against and relief, in-depth drawing). To get such pictures, you can use a special roller with an image applied to it. In stores, you can buy ready-made templates for this technique.
Textured plasticinography
- the most difficult technique, as it involves the production of a three-dimensional image. It can be distinguished bas-relief
(fr. bas-relief - low relief, the volume of the figure is less than half), high relief
(protruding more than half) and counter-relief
(Latin contra - against and relief, in-depth drawing). To get such pictures, you can use a special roller with an image applied to it. In stores, you can buy ready-made templates for this technique.
Caring parents will always find an opportunity to influence the development of children's creative abilities through plasticineography. This is perhaps the most accessible and exciting way to solve many issues of development and education, thereby preparing preschoolers for school education and enriching family leisure.
This is one of my works that I did for the competition "My native Russia", which took place back in November. It is dedicated to the feast of the Transfiguration of the Lord, which is also called the Apple Savior. I sketched the sketch from the picture on the calendar (unfortunately, I couldn't scan it, the printer categorically refused to do it).
This is a separate photo of a mother giving an apple to a girl. On the panel she has the most beautiful outfit, probably. And the most difficult one! All these strips were folded and glued separately. My cousin especially liked the diamonds on the apron. Says how plastic turned out!

And here is a girl and a little boy. To be honest, I like the boy in the picture the most. I named him Seryozha. He hid behind my mother, girl, he was scared, probably :). By the way, she wanted to make a dress almost the same as that of an adult, but it turned out a little differently. The girl has berries in the basket.

Here is the last character, the most heroic. He boldly climbs up a tree for apples, he has already collected two baskets. In the very corner you can see a dove.

The pigeon lit up a little here, but you can see the leaves on the apple tree. It turned out to be voluminous!

Here is another photo in conclusion. Temple. I blinded the cross from "golden" plasticine, and even embellished it with glitter gel. I cut the logs and boards in a stack. And a "scroll" with an inscription. I tried to make it antique. In my opinion it worked. That's all, but I have another panel, I will show it a little later. All with the past Christmas and New Years, and today's Epiphany!

Content
Plasticine is one of the favorite materials for children's creativity. With it, you can sculpt original crafts and even create drawings. Plasticine is an unconventional artistic technique that involves drawing with plasticine on cardboard or other dense base. Finished works can be flat, semi-volume or volumetric. Being engaged in plasticineography, the child develops fine motor skills, the movements of the fingers are differentiated. This is a good preparation for learning to write.
Plasticine painting technique
The technique of plasticine painting is a bit like oil painting - colored plasticine is rolled into balls and applied to cardboard with strokes. The young artist develops his color perception and sense of harmony. For good work, you need to choose a high-quality plasticine of the appropriate type.
The assortment is great: there are denser varieties, and there are soft, smooth, easily melting varieties. In the sets, you can find any palette: both from basic colors, and including many shades. If you are using plasticine as paint, you can mix the two colors to achieve the desired tone.
When working on plasticine paintings, you need to thinly roll out all the folds, inequalities. If somewhere the layer turned out to be thick, uneven, the excess can be removed using stacks. Strokes on a plasticine panel can be different. It is not necessary to work with your fingers, you can use tools - stacks, a knife, a toothpick, a roller, syringes with and without needles, sticks for indentation. To make a picture from plasticine, you need to prepare the base, and fix the details of the desired shape and color on it.
Plane modeling
A small child can be taught to make paintings from plasticine according to the same principle as paint. The first stage will be flat modeling - the creation of paintings of varying degrees of relief. There are forms with a protruding and in-depth image:
- High relief (the image protrudes strongly above the surface).
- Bas-relief (details protrude slightly above the base).
- Counter-relief (an image deepened into the surface of the base: the drawing is scratched or pushed onto a plane with a stack, stick).
So you can depict a picture previously outlined with a contour on a cardboard or glass base. The child can wield a finger, learning to calculate the force of clicks and strokes, or use the tools at hand. In kindergartens, they offer to depict, for example, recognizable plots from your favorite fairy tales or cartoons using the technique of flat sculpting or to make plasticine comics.
Volumetric paintings from plasticine
When your child learns how to make simple flat images, you can try to make a three-dimensional picture, similar to a work of art. The essence is not so difficult: you need to separately sculpt the details of the work (wood, fruits, animals), and then fix them on the surface.
Parts can be of any shape and size. For their manufacture, various techniques are used: rolling, flattening, rubbing, smoothing, pulling the part away from the general shape. It must be remembered that if you are going to place drawings from plasticine under glass, the material may crumple, and the work will lose its original volume.
DIY plasticine paintings
Drawing with plasticine is well suited both for independent study with a child, and for labor lessons for elementary school students or fine motor exercises in kindergarten. When working, the child learns to make both large and very small details (eyes, leaves). For sculpting you will need:
- Base (you can use glass, unnecessary discs, a sheet of plywood).
- A board for rolling out plasticine and for sculpting parts.
- Knives for cutting and applying small parts.
- A simple pencil.
- Water for occasionally wetting hands.
First you need to draw on the basis of a pencil drawing a template for the future picture (field, green forest). For him, you need to rub small plasticine pieces with your fingers. Parts can be formed from round or elongated pieces of different sizes. You can use a separate stencil for each part. Then they must be carefully pressed into the background.
If you get irregularities, smooth them out with your fingers, previously soaked in water. In addition, remember the rules for composing a composition: those details that will be in the foreground should stick out more than others and be executed more clearly (for example, bright flowers, pebbles on the seashore, animals). Fasten them on top of the rest of the parts (in the last can) and add some pattern applied with a needle or toothpick.
On cardboard
A plasticine painting on cardboard for children can be the first step towards making more complex crafts. It is not necessary to buy special material, you can use, for example, cut sheets from a shoe or household appliance box. It is recommended to cover the finished picture with varnish so that it does not become dusty.
The work will require the same materials as for any other sculpting technique. Remember that it is more difficult to wipe off excess stains from cardboard, so keep napkins ready. The step-by-step algorithm of actions is as follows:
- We put a drawing on the cardboard (you can buy a ready-made stencil with a picture in a special store, then fill it with plasticine).
- We make the background of the picture. First, let's define the background color. Small pieces are pinched off from the block and applied to the surface in the form of strokes.
- We rub the plasticine strokes with our fingers within the boundaries of the picture.

On paper
To create a picture from plasticine on paper, it is better to choose a dense base, because too abrupt movement can tear a thin sheet. For the first works, it is recommended to start with the simplest paintings, for example, kids will like the image of a cheerful rainbow, white clouds and a bright sun in the sky, green grass with cornflowers or daisies. For the first works of a preschooler, it is better to choose a small size (about a quarter of an A4 sheet).
Pinch off small pieces from the bar and apply to the base in accordance with the plan. In this case, different sculpting methods are used - rolling or smoothing, smearing, sometimes pinching, flattening or flowing from one color to another is required. If your idea involves a clear drawing of a large number of small objects, a medical syringe without a needle will come in handy. They use it like this:
- Put a piece of plasticine inside the syringe, heat it carefully (on a hot battery or in a cup of warm water);
- Squeeze out with thin threads (if you want thicker, use a pastry syringe).
- Soft transitions of shades can be obtained if you first mix the necessary shades of plasticine in your hands, and only then load them into the syringe. Do not mix more than two colors at the same time.
On glass
Plasticine applications on glass are an easy-to-perform, but dangerous kind of creativity. You must follow the safety rules so as not to get hurt. To create an applique you will need:
- Multi-colored plasticine.
- Photo Frame.
- Black ink or black marker.
- A sheet of paper with a printed pattern.
- Cotton wool and alcohol.
Since very few people succeed in creating pictures for plasticineography on glass the first time, it is better to look at the master class on the Internet step by step with the child in advance, and then follow the recommendations:
- Find drawings (it is better to choose simple black and white). Remember that the younger the child, the larger the details should be.
- Remove the glass from the photo frame.
- Degrease the glass by wiping with cotton wool and alcohol.
- Place the printed sketch under glass.
- Outline the outline with a black marker on the glass.
- Get the drawing.
- Determine what colors you will use. For preschool children, the task can be simplified - leave a colored drawing under the glass. So the child will see what color the plasticine should be taken.
- Separating small pieces of plasticine of the desired color, stick them on the glass, rub without going beyond the outline of the drawing. The more the material is rubbed (into a thin layer), the weaker the pigment will be.
You can choose a method of work: either first fill in places of one color with plasticine, and then move on to others, or first perform small elements (separately sculpt the eyes of the beast, leaves, small flowers or a ladybug), then go to the main drawing from plasticine.
When the entire base is filled with plasticine, you will need the help of an adult. The picture must be turned over with the front side facing you, consider and correct the flaws (gaps between the pieces of plasticine, going beyond the contour). Then wipe the glass again with alcohol, without touching the drawing, and insert the work into the frame.

25858
Plasticine (or plasticine painting) is a new interesting technique for working with plasticine to create three-dimensional paintings. It is available even to the smallest children, which makes it more and more popular.
The benefits of plasticine painting
The benefit of this lesson is that children study the shapes, properties of objects, develop finger movements, which helps the development of speech.
When studying subjects, the observation and imagination of children develops, modeling helps them to create and fantasize.
In the classroom, coordination of movements, consistency in the actions of the eyes and hands develops, children learn to work with tools.
The technique of this creativity is simple and accessible to everyone, everything you need is easy to purchase in the store, so it's easy to organize classes at home.
Teachers advise you to engage in this original creativity with your child, your enthusiasm will certainly be passed on to the children and you can greatly benefit from this activity. This is not only the development of the imagination and creativity of children, but also the expansion of their knowledge of nature, the development of mental abilities, attention, memory, hand motor skills. This creativity will help prepare the child for school, diversify family leisure.
Classes can be started from two to three years, be sure to pay attention to the peculiarities of age and the skills acquired, so that the baby does not lose interest due to difficult tasks.
I invite you to a full-fledged online video lesson (45 minutes) on plasticineography "Postcard with a penguin." For children over 5 years old, with mom 3+.

Goals and objectives of plasticinography
The purpose of plasticineography is to develop the creative and artistic abilities of children.
Younger Tasks (4-5 Years)
The peculiarities of four- and five-year-old children are that they actively strive for independence. In addition, imagination and fantasy develop at this age.
- interest in creativity, develop artistic skills;
- to acquaint with a new occupation - plasticine painting;
- obtaining knowledge about the properties of plasticine and other means of image, using this knowledge in practice;
- development of a sense of form, color, composition;
- fine motor skills training, preparation for writing;
- fostering patience, diligence, activity, aesthetic taste in preschoolers.
Children of 2 - 3 years old can start practicing, while you need to use the simplest techniques (no more than two). By the age of 4 - 5, you can move on to more complicated techniques, use flagella, spirals, additional decorative elements; children learn to respect the boundaries of the drawing.
Download sculpting templates


Tasks for the older age (6-7 years old)
Age six - seven years - transitional to primary school, there is an internal restructuring; the age of seven is often a crisis in the development of a child.
The peculiarities of children six to seven years old is that at this age the main thing is visual - figurative thinking, sensitivity during this period is increased, more different colors and details appear in the works.
The tasks of plasticine painting at this stage are as follows:
- the study of new species - landscapes, images of animals and people, fantasy works;
- development of initiative, creativity;
- obtaining skills in using various improvised means;
- development of the ability to combine and combine different colors;
- learning new ways - bas-relief and tiles, working with a syringe, "finishing" - making frames, albums, etc.
The process of creating a plasticine pattern is as follows:
- you need to choose a picture that we will depict, colors for the background and images;
- then transfer the drawing to the base with a marker;
- perform work in plasticine;
- draw up the result of the work - make a frame, varnish, place in an album.
The advantages of plasticine painting:
- uncomplicated technique in work;
- relieves muscle tension, helps to relax;
- trains fine motor skills;
- easy to fix bugs and make changes.
In the classroom, it is useful to use the artistic word, game methods.
The themes for work should be familiar to children - these can be objects that they see at home, in the forest, in the park, in books (toys, sweets, fruits and vegetables, plants and animals, fairy-tale characters).
- use soft plasticine or preheat with hot water;
- it is better to take a dense material as a basis for work, for example, cardboard or cardboard, covered with a layer of adhesive tape (it is more convenient to apply plasticine on it and remove its excess);
- prepare a workplace for creativity - a board or oilcloth, a wet napkin;
- before starting work, apply to the base, under the film, the contours of the image;
- after class, first wipe your hands with a napkin, and only then wash with soap;
- take breaks from work, warm-ups for hands and fingers;
- cover the finished drawing with colorless varnish or hairspray so that it can be stored for a long time.

Materials for plasticinography:
- plasticine (preferably wax, it is more convenient to work with and brighter);
- base (cardboard, plastic, glass);
- technical means (stacks - special plastic knives; sticks, toothpicks, etc.);
- decorative elements (beads, buttons, beads, threads, scraps of fabric, cereals, sequins, natural materials - acorns, leaves, cones, branches, shells, shells, nuts, seeds, small pebbles, grains, etc.);
- medical or confectionery syringe;
- wipe your hands with a damp cloth;
- board for rolling sausages and balls.
You can buy a special set for creativity with plasticine in the store.
Video - sculpting lesson
Sculpt a New Year's Penguin http://artplastilin.ru/intro/
I have a lot of creative ideas on my Instagram page, join me !! https://www.instagram.com/artwithbaby/
Techniques and methods of plasticineography
Painting with strokes
The technique consists in smearing small pieces of plasticine with your finger.
It is most convenient to use the index finger, strokes can be made of different lengths, depending on what needs to be depicted - long details (tree trunk, wave, blade of grass) or short (flower petal, sun rays, leaves).
You can use this technique - to smear alternately with different fingers of both hands, this is useful for both fingers and brain activity.
Drawing with plasticine balls
Roll small plasticine balls on the board, press down to the base. Using this technique, you can make volumetric details or fill in the contours of the drawing with them. 
Flattening at the base of rolled balls
Roll up small balls, then flatten them one by one on the base. You can use them as separate elements, together with others, or you can fill the entire surface with them.
Smearing on a large surface
The technique is the same as for small pieces, only large areas are covered with plasticine. You can combine different colors, mix them, vary the layer thickness.
Scratching patterns on a layer or plasticine parts
On the surface filled with a layer of plasticine, or individual parts, apply various patterns using the scratching method. This can be done with the help of different tools - sticks, toothpicks, pen caps, etc. The patterns from the spirals look original and add volume.
Rolling plasticine sausages
 Children love this technique very much. You need to roll a small piece of plasticine into a sausage and press it to the base. From such sausages you can make: ornaments, snowflakes, twist them into a spiral, twist together two or three sausages of different colors. There are many variations of using this technique.
Squeezing plasticine from a syringe
 If you need a lot of identical even sausages in the drawing, it is more convenient to make them with a syringe (or a garlic press). You will need a syringe with a cut, sharp tip and a container of hot water. Place the plasticine in the syringe, immerse it in water for one minute and gradually squeeze the plasticine out of the syringe onto the base. Wait for the material to cool slightly and harden. Then you can give the sausages the desired shape.
The combination of various techniques looks original - a volumetric applique and a background made using the smear method.
Types of plasticine painting.
- Straight. This is a traditional type of plasticine painting in which the drawing is applied to a horizontal surface. Young children can learn this technique.
- Reverse (stained glass)... It is carried out on the reverse side of a transparent surface - glass, plastic or plexiglass. Previously, the image is drawn with a marker, then the main drawing is applied with plasticine.
- Modular... In this type of creativity, the drawing is applied with balls, sausages, cakes and other elements. This type is the most difficult, you need the ability to use all the techniques of drawing with plasticine.
- Mosaic... In this technique, the drawing is made from balls. The technique is simple, you need to choose the right colors and fill the contours inside the drawing with rolled balls.
- Contour... The drawing consists of the contours of objects made in the form of thin sausages or flagella.
- Multilayer... In this technique, layers of plasticine are applied sequentially. She best depicts landscapes (sky, sea, forest, mountains), while the layers are superimposed on one another. This sophisticated technique is suitable for older preschoolers.
- Textured... In this image, the pattern is convex, they are divided into three types - a bas-relief (a slightly convex image above the background), a high-relief (a strongly convex image above the background) and a counter-relief (a concave or in-depth pattern).

Painting is one of the most difficult forms of art. And man is a creature who always tries to make his life easier. And since people love art, and every second person wants to create, plasticine painting was invented. Even a child can perform work in this technique. The main thing here is patience. Indeed, unlike an oil painting, a plasticine one cannot fail. Today we want to offer several ideas for creativity and inspire to create a masterpiece.
A little about plasticine painting
This art form appeared relatively recently, at the end of the last century. Before that, plasticine artists sculpted volumetric figures. Often this material was used, and is still used today, by sculptors to quickly make a shape.
The technique of plasticine painting was initially mastered only by children. The artists considered it pampering. But the kindergarten teachers were happy to smear plasticine on cardboard with the children. This process develops fine motor skills, imagination and helps to strengthen the muscles of the arms. But over time, plasticine painting went beyond the kindergarten, and today it has many admirers among adults. True, professional artists still consider this art form too primitive. But in fact, it is not primitive, but decorative. And it definitely has a right to exist.
Types of such painting
As in any art, with its development, many different techniques appear in which you can create. What types of plasticine painting exist?
- sculpting with strokes;
- relief molding;
- work on a template;
- modeling from plaits;
- contour creation of works;
- modeling with peas.
Each of the varieties of such painting requires its own material. Types of plasticine are different. There is a soft material that spreads well over the surface. And there is hard plasticine, which holds its shape well.
Materials required for work
To create a picture using the technique of plasticine painting, you need to purchase everything you need. And what is required for work? Various types of plasticine. And what are they? Plasticine happens:
- usual;
- paraffin;
- wax;
- ball;
- fluorescent;
- sculptural;
- freezing.
In addition to plasticine, you will need stacks. These are plastic knives. Usually they are put into large sets of plasticine. But if you decide to get down to business seriously, then get quality wooden stacks.
The basis for any work should be either cardboard or a piece of fiberboard. The second option is preferable.
Various napkins and rags may also come in handy.
New year landscape
Leaving for the winter holidays, children, and often adults, do not know what to do with themselves. Everyone can try themselves as a plasticine painter. The result of your creativity will inspire throughout the year. How to create a picture using the technique of plasticine painting? New Year will be a great subject for the image. First, you need to draw a sketch on a cardboard with a pencil. It can be a house, a bridge, a river and snow-covered trees. We will create this picture in two techniques: sculpting with strokes and sculpting with polka dots. The first step is to paint the background. We take blue plasticine, knead it in our hands, tear off a small piece and spread it on a piece of cardboard. You need to rub the material hard so that the hitch is of high quality. In order to reduce the consumption of plasticine, the background layer must be made thin. Blue strokes should be alternated with white and dark blue. It will be a river. Next, draw the sunset. It will be purple-pink. The second stage of the work is sculpting the second plan. It will be a house, a bridge and trees. We create a house as follows. We roll small multi-colored balls from plasticine and fill the contour with them. The final action is to draw the trees in the foreground. We make the trunk in the usual way of spreading plasticine, and we make the branches from bundles.
Stylized tree

We will make this work in a very unusual way. You will need a syringe to create a painting. We remove the needle from it, immerse the plasticine in the cylinder and insert the piston. Fill the first syringe with a dark green material, and the second with a light one. Now we heat water in a saucepan and put syringes there. When the plasticine has melted a little, you can start working. We take out the syringes and squeeze the sausages onto the cardboard. We alternate between dark and light plasticine. We glue the sausages in semicircles, as if creating the effect of a hilly area. When the herb is ready, rinse the syringes and fill them with blue shades of plasticine. We warm up the material and start drawing the sky. We make it in straight stripes, alternating several shades. Where the sun will be, you need to leave free space. Using a similar technique, we create a celestial body, a tree and stylized apples. Plasticine painting is an interesting activity, and the method of working with a syringe is one of the simplest, but at the same time very effective.
Pussy willow

One of the interesting leisure activities is plasticine painting. Read the master class on making a pussy willow bouquet below. To create such a picture, you will need colored cardboard and plasticine in blue, blue, brown and white. We prepare the material. You need to start by kneading blue and blue plasticine. When the material becomes soft, roll the sausages out of it. Now you need to divide the sheet of cardboard visually into three parts. The bottom of the sheet will be occupied by a vase. We outline its middle and begin to twist the sausages into a snail in this place. Cyan and blue should be alternated.
When the large circle is ready, we frame it with straight sausages from above and below. Now we start making pussy willow branches. To do this, you need to roll sausages from brown plasticine. We lay out the branches in no particular order. It is desirable that you get an odd number of them. We collect pussy willow buds. To do this, roll up small brown and white sausages. We connect them to each other. Now the buds need to be glued to the branches - and the picture will be ready.
Gzhel

Plasticine painting can be made based on folk crafts. For example, gzhel. Let's create an image of a bird from the bundles. On the cardboard you need to draw the outline of the chicken. The picture can be copied from the sample above, or you can come up with your own picture. The bird will be complemented by a floral ornament located above and below. For the manufacture of this work, you will need a syringe. We fill it with plasticine, heat it up in a saucepan and get down to creativity. We lay out the tail and contour of the bird, as well as the ornament with thin bundles. You need to complement the image with thick stripes of light blue and blue. Roll the sausages by hand and flatten them slightly with your fingers. Create an ornament inside the bird. Stack or fingernail on thick sausages to apply a pattern in the form of incisions. Cut out the contour of the head from the rolled plasticine layer. It remains to place small details. We roll up balls of blue plasticine and place them in accordance with the picture. White dots should be placed as color accents. They need to be made from balls and glued to the center of the blue circles.
Sailboat

Plasticine painting works look beautiful and original. Before starting work, you need to create a sketch. We take tinted cardboard and draw the outline of the sailboat and waves. To create an image, we need plasticine heated in syringes. When the material melts a little, let's get to work. We lay out the silhouette of the boat with thin bundles. Stretching from brown to white will look beautiful. When the hull is ready, you need to make the sails. We also draw them with tourniquets squeezed out of the syringe. But the flags will have to be done manually. It remains to add waves to the picture. We make lambs from plasticine. You need to choose the material carefully so that the colors blend beautifully with each other. If your kit does not have a suitable shade, you should make it yourself by mixing blue plasticine with white. As an addition, you can glue seagulls over the sailboat. The work should be framed using plasticine. You need to roll up two sausages and twist them into a tourniquet. If a rupture occurs in the tourniquet, it is better to redo it. This work can be supplemented with shells and metal fittings in the form of an anchor.
Girl in a boat

Only an experienced master can create such a picture. Plasticine painting from a syringe requires skill. Before you directly start work, you should draw a sketch. Then you need to warm up the plasticine in syringes. And this will have to be done in batches. Alternatively, you can leave unused plasticine syringes in warm water to prevent the material from hardening. The first step is to make a boat. It is made from shades of brown and yellow plasticine. There will be a shadow on the right and light on the left. This must be taken into account when filling the contour of the boat with harnesses.
When the swimming device is ready, we move on to making the girl. With strokes we create her face and hand, and then hair and dress are laid out with braids. And again, you need to remember about light and shadow. The hair will be darker on the right and lighter on the left. The dress should be made in layers, and it should be started from the end, that is, from the hem. Tier by tier we apply harnesses, creating the effect of volumetric ruffles. We pass to the final part - "draw" the sea. The waves will look like swirling snails. They also need to be made in layers to create a background and foreground effect. Some circles can be emphasized with white stripes - these will be highlights. We make a frame from the harnesses, and on top you can depict a wave to show the infinity of the water element.
Giraffes

Making animals out of plasticine is an easy task. Moreover, making figures on a plane is even easier than sculpting them in volume. How do you "paint" a picture with two giraffes? The first step is to make a background with strokes of soft plasticine. Then sculpt animal figures. They are created as follows. To make a large giraffe, we roll out a layer of plasticine. Cut out two ovals from it, one small and the other elongated, and a rectangle with soft edges. We glue all this in the required sequence on the background. Legs, tail and horns should be created from thick sausages. The ears should be in the form of drops. Now you need to decorate the animal.
We make hooves and balls for horns from purple plasticine. We make spots and a tail brush from yellow circles, and eyes and nose from black balls. By analogy, create a small giraffe. Now let's move on to making trees. The brown rectangles with soft edges will become the trunks. They can be decorated with plaits to match. Roll balls from green plasticine and flatten them. Thus, we create foliage. A variety of birds can be planted on the trees.
Social work

Children can be instilled with respect for our smaller brothers in different ways. One of them is to sculpt animals from plasticine. It is desirable that some social problem is raised in the work, for example, friendship between a man and a dog. You need to start making this picture from plasticine by rubbing the material into the background. Then you need to make the background - it can be windows and bricks that peep out from under the peeling plaster. In the foreground, with strokes depict a girl with an umbrella and a dog. It remains to add rain drops and a symbolic inscription to the composition.
Winter picture

Plasticine painting for children is not only a way to pass the time. Through such creativity, fine motor skills are developed, as well as imagination and patience. You can create a picture for a winter theme not only on a cardboard, but also on a disposable paper plate. We close this product with blue and white plasticine, which we rub into the cardboard with strokes. Now we build a hut from rectangles. We supplement it with a window. We make the roof. In the foreground, you should "draw" a spreading Christmas tree with green strokes, and fold rowan branches from the flagella. You need to complement the composition with a bullfinch, a month and snow flakes.
Dog

It will be easy to create any animal if you print its outline on a printer. The object of our creation will be a dog. Plasticine painting can be not only realistic, but also decorative. Therefore, we will make the animal multi-colored. We warm a piece of plasticine in our hand. We decorate various parts of the dog with strokes of this color. Then we take a different shade and do the same. The work will be finished when there is no "living space" left on the dog, that is, it will all consist of plasticine strokes.
 Musical instruments in kindergarten presentation on the topic Presentation on the topic: children's musical instruments
 Feathered friends Why birds are called feathered
 Our Feathered Friends, Nature Exploration Lesson Outline Why We Call Birds Feathered Friends