Business card in English, sample Word. How to create business cards in Microsoft Word. We make text design
Exchanging business cards is the most convenient way to distribute contact information at business meetings, negotiations, promotional activities, exhibitions, conferences, as well as with personal informal communication... This small cardboard or plastic card usually contains information about the owner and organization, as well as the necessary addresses and phone numbers to contact him. For professional execution of business card layouts, powerful graphic editors are used, for example CorelDraw, and for their printing and cutting - specialized printing equipment. In cases where it is not possible to make cards in this way, it is quite possible to create their own design and use ordinary office equipment. Unlike programs for editing text documents, in complex graphic editors not everyone knows how to work. Therefore, in this article we will answer the question that interests many: how to make a business card in Word quickly and easily.
The most common card format is 9x5 cm, and the size of a standard A4 sheet is 29.7x21 cm. Therefore, it is easy to calculate that 2 columns of 5 business cards can be placed on one page.
As a result, we have formed the following page of business cards:

We print it on thick paper, carefully cut along the lines and get ready-made cards.
Another way to prepare a layout for business cards in the Word is to use templates that can be found by selecting the "File", "New" menu items and writing the word "Business cards" in the "Search for templates on the network" line. In this case, an almost finished page of cards is created, in which it is enough to enter your own data in one of the cells, and in the rest they will change automatically.

In conclusion, it should be said that Microsoft Word is not intended to create the considered printing products, although its capabilities visual design information is very large. In addition, self-printed and self-cut cards often differ significantly in quality from those produced professionally not in better side, which negatively affects the image of their owner. Therefore, making business cards with your own hands is worth it only in exceptional situations.
There is a paging file on every computer, regardless of how much RAM you have installed. You can find it either on the system partition of the disk (most often it is C :), or on another partition if you transferred it. It is called pagefile.sys.
In the Group Policy Editor
Users with Windows Professional installed can clear virtual memory via Local Group Policy Editor... To open the required window, press the Win + R key combination and type gpedit.msc in the "Open" field. Click OK.
Then, in the tree on the left, open one by one: "Computer configuration" – Windows Configuration – "Security Options" – "Local Policies" – "Security Options"... Further in the list of parameters, find: Shutting Down: Clearing the Virtual Memory Paging File, this is if you have Windows 7, 8 or 10. On Windows XP it will be called: Shutting Down: Clearing the Virtual Memory Page File... Double click on it with the mouse.
The Properties window will open. While in it on the first tab, put a marker in the "Enabled" field and click "Apply" - "OK".
Now the paging file will be cleaned up after each shutdown of the computer. All data in it will be overwritten with zeros. It should also be noted that the process of shutting down the PC itself will take longer.
Using Registry Editor
If you have Home Windows installed and you cannot enter group policies, or you just like to do everything through the registry, then open the "Run" window - Win + R, and write regedit in the field. Click OK.
Then follow the path, which is circled in the screenshot below with a rectangle. As a result, you should be in the "Memory Management" folder. Find the parameter "ClearPageFileAtShutdown" in the list and double-click on it.
A window will open to change it. Enter the number "1" in the "Value" line and save.
Those who do not have the required parameter will have to create it manually. You should all be in the same "Memory Management" folder. Click in an empty area of the window with the right mouse button and select "New" - "DWORD Parameter (32 bit)".
Then you need to give it the required name. Then double-click on it to open the "Change ..." window. Write down "Value" - "1" and save.
Finally, I want to show you one more trick with this file. And so, we already know that data that does not fit in the computer's RAM is flushed to the hard drive in the paging file. And if this memory is large enough for you, then you can prohibit saving data to disk.
This is done as follows. Follow the same path (1) to the desired folder(2). Look for the parameter named "DisablePagingExecutive" (3) in the list. Click on it and change the value to "1" (4). Click "OK" (5).
If you want to return everything back, then either put the marker in the "Disabled" position, or change the parameter value to "0".
The described methods are suitable for a computer with operating system Windows XP, 7, 8 or 10. Choose one of them and you can rest assured that when you turn off your computer, the paging file will be cleared and all data saved in it will be overwritten.
Rate article:
(1
estimates, average: 5,00
out of 5)
Webmaster. Higher education in the specialty "Information Security" .. Author of most articles and lessons of computer literacy
- Download office installer
- Run the installer
- Wait for the installation to complete
- the value of the shade and its psychological perception by a person;
- the audience for which business cards are made;
- the color must match the proposed product or activity.
- Don't use more than two different fonts on the same business card. The lettering should be in the same style in order to attract the attention of the person;
- Use Font Families to Match Smartly different shapes characters;
- The font color should contrast well with the background shade or image;
- The size of the letters must be legible. Use a character size of no more than 10-14 typographic points (TP).
- The name of the company;
- address;
- Your full name;
- position held;
- contact number;
- email address;
- company address;
- schedule.
Creating your own business cards often requires specialized software that allows you to create business cards of any complexity. But what if there is no such program, but there is a need for such a card? In this case, you can use a tool that is not standard for these purposes - text editor MS Word.
First of all, MS Word is a word processor, that is, a program that provides a convenient way to work with text.
However, having shown some ingenuity and knowledge of the capabilities of this processor itself, you can create business cards in it no worse than in special programs.
If you don't have MS Office installed yet, then it's time to install it.
Depending on which office you will be using, the installation process may differ.

If you signed up for a cloud office, then the installation will require three simple steps from you:
Note. The installation time in this case will depend on the speed of your Internet connection.
Installing offline versions of MS Offica using MS Office 2010 as an example
To install MS Offica 2010, you need to insert the disc into the drive and run the installer.
Creating a business card in MS Word
Next, we will look at how to do it yourself Business Cards in Word using the example of the MS Office 365 Home office suite. However, since the interface of the 2007, 2010 and 365 packages is similar, this guide can be used for other versions of the office as well.
Despite the fact that there are no special tools in MS Word, it is quite easy to create a business card in Word.
Preparing an empty layout
First of all, we need to decide on the size of our card.
Any standard business card has dimensions of 50x90 mm (5x9 cm), we will take them as a base for ours.
Now let's select the tool for creating the layout. Here you can use both a table and a Rectangle object.
The table option is convenient because we can create several cells at once, which will be business cards. However, there may be a problem with the placement of design elements.

Therefore, we will use the "Rectangle" object. To do this, go to the "Insert" tab and select from the list of shapes.
Now let's draw an arbitrary rectangle on the sheet. After that, the "Format" tab will become available to us, where we indicate the dimensions of our future business card.

Here we set up the background. To do this, you can use standard tools that are available in the Shape Styles group. Here you can choose a ready-made fill or texture, or set your own.
So, the size of the business card is set, the background is selected, which means that our layout is ready.
Adding design elements and contact information
Now you need to decide what will be placed on our card.
Since business cards are needed so that we can provide potential client contact information, the first step is to decide what kind of information we want to place and where to place it.
For a more visual representation of their activities or their company, a thematic picture or company logo is placed on business cards.
For our business card, we will choose the following data layout scheme - in the upper part we will place the last name, first name and patronymic. The picture will be located on the left, and on the right Contact Information- phone, mail and address.
To make the business card look beautiful, we will use the WordArt object to display the last name, first name and patronymic.

Go back to the "Insert" tab and click on the WordArt button. Here we choose the appropriate design style and enter our last name, first name and patronymic.
Next, on the "Home" tab, we reduce the font size, and also change the size of the inscription itself. To do this, use the "Format" tab, where we set required sizes... It would be logical to specify the length of the inscription equal to the length of the business card itself.
Also on the tabs "Home" and "Format" you can make additional settings for the font and display of the inscription.
Adding a logo

To add an image to a business card, go back to the "Insert" tab and press the "Image" button there. Next, select the desired image and add it to the form.

By default, the picture is set to wrap text in the value "in text" because of which our card will overlap the picture. Therefore, we change the flow to any other, for example, "top and bottom".
Now you can drag the picture to the desired place on the business card form, and also change the size of the picture.
Finally, it remains for us to post contact information.

To do this, it is easier to use the "Text Box" object, which is located on the "Insert" tab, in the "Shapes" list. Having placed the inscription in the right place, we fill in the data about ourselves.
To remove the borders and background, go to the Format tab and remove the shape outline and fill.
When all the design elements and all the information are ready, then select all the objects that make up the business card. To do this, press the Shift key and left-click on all objects. Then press the right mouse button and group the selected objects.
Such an operation is necessary so that our business card does not “crumble” when we open it on another computer. Also, a grouped object is easier to copy.
Now all that remains is to print business cards in a Word.
It is difficult to imagine a person who, by the nature of his activity, in modern world could do without a business card, or business card. This is understandable. It contains all the necessary information about its owner, including contacts. But to create a quality business card, you need a professional software and equipment. What if you need to transfer information very urgently? Let's try to consider the question of how to make business cards in the "Word" ( Microsoft Office Word).
Features of MS Word
Many users clearly underestimate the Word program, since this package is not only a text editor, although it was originally designed specifically for working with text. The app is equally good at handling graphics, tables, mathematical formulas, diagrams, sound, etc. So making a business card in Word in a hurry is as easy as shelling pears.
Possible options
If we consider the capabilities of the MS Word office application in terms of quickly creating business cards, among the simplest is the use of ready-made templates.
Drawing is a rather laborious process. It will be necessary to insert or draw rectangles, and only then enter text into them and place graphics. It takes a long time, so we will not dwell on this option.
For some reason, many believe that the simplest solution to the question of how to make business cards in the "Word" is to insert tables. You can disagree with this, because there are some nuances associated with specifying indents, formatting the table itself and the text, copying and pasting the final material, etc. It is much easier to create a business card in Word using existing templates.
Using templates
In almost any version of MS Word you can find special ready-made solutions to create one or another text document even containing graphics. Business cards are no exception in this regard. With this approach, the user does not have to spend time creating and editing text and graphics. In addition, the standard size of a business card is 5 x 9 cm. The template itself provides this size initially.
You need to go to the "File" menu, then - "New", and select "Business Cards" from the list of available templates. If a version of the program is installed higher than Word 2010, such a tab may not be present in the list. Then you need to enter the word "business card" or "business cards" in the search field on Office.com. Next, you need to select the desired template and just click the "Download" button. Everything. Business card creation is completed. Now you can edit the data in the cells.

By the way, such a solution to the question of how to make business cards in "Word" is remarkable not only for its simplicity. This is because when you edit text in one cell, it automatically changes in all the others. This, in turn, saves the user from the tedious process of copying content and then pasting it into all other fields.
Business cards from the table
Many people prefer the use of tables, believing that in this case, you can design a business card to your liking. But the process will be more complicated. A few words about how to make business cards in Word using a table.
First, you need to set margins in the Page Layout menu. The value for each field must correspond to 0.5 inches, or 1.27 cm. After that, from the Insert menu, select the Table command and specify the size (2 x 5 cells).

Then select the entire table (for example, Ctrl + A for the entire document) and right-click the "Table Properties" menu.

On the "Line" tab, put a checkmark in front of the "Height" and "Width" parameters and set the corresponding values in 5 and 9 cm. There is a mode window on the right. It indicates the value "Exactly". Now, in the "Cell" tab, after pressing the "Parameters" button, set all values to zero.
Now you can start filling cells with text, add graphics, change font color, fill, and much more. Here, as they say, what the imagination is enough for. When the work is finished, you need to copy the contents of the main cell ( finished business card) and then just paste into all the others. If desired, you can remove the grid of the table using the "Borders and Fill" menu for this.
Outcome
As you can see, the solution to the problem of how to create a business card in Word is quite simple. Naturally before professional level very far away, and exchange such printouts on the highest level does not make sense. Professional business cards are created using completely different programs, equipment, decoration and paper. Embossing is often encountered, which cannot be done in the "Word".
In principle, the business cards described in the article are suitable for quickly transferring information, say, from a computer customizer to clients, and can also be used as a template for submission to a company or printing house that creates and prints business cards at a professional level.
The MS Word text editor allows you not only to view and arrange office documents.
With built-in templates or ordinary elements on the dashboard, you can create unique business cards for yourself or the whole company.
The program contains the necessary set of parameters with which you can creatively approach the task at hand.
After mastering all the techniques and methods, you no longer have to use special programs or contact professional agencies to create business cards.
All the steps presented in the article were performed in MS Word 2016 and 2007. All instructions are universal and suitable for the 2007, 2010, 2013 and 2016 versions of the editor.
Background and texture selection rules
The greatest amount of time when creating your own postcards, business cards, cards is taken up by design development.
As a rule, textures, background images and additional elements take a long time to select. All of them must be harmoniously combined and complementary to each other.
Choosing the right background color isn't about adding your favorite shade from the palette. When choosing a color, follow the general rules:
Since the business card is small, you shouldn't use a lot of different textures, colors, and text.
The information should be presented in a concise manner and clearly reflect the name of the organization, the name of the person, the position held, the company logo, address and contact information.
Positioning text and choosing fonts
When choosing text for your business card, follow these guidelines:
Using standard Word templates
Each version of the Word has a fairly large number of ready-made templates for creating business cards, invitations, postcards, title pages, advertising brochures and other items.
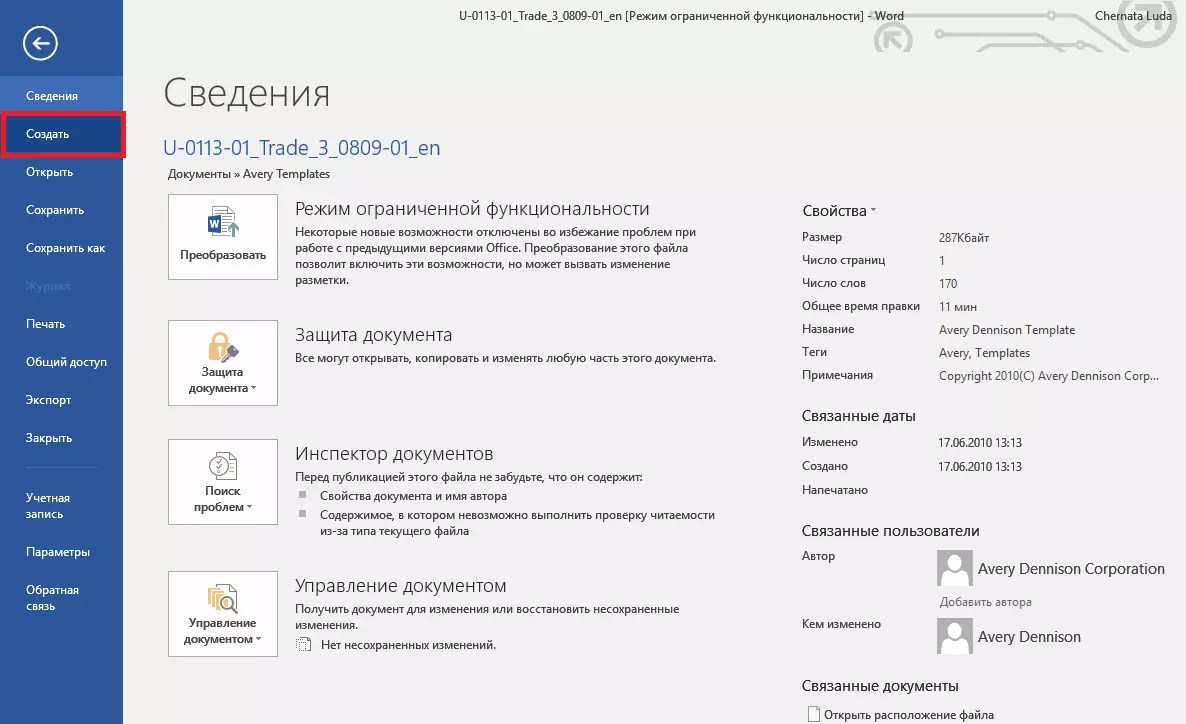
Let's take a closer look at how to make a business card in Word using built-in templates. Open your word processor and click on the File tab. Then select "Create".

As a rule, business card designs are located throughout the sheet (8-10 copies each). This allows you to quickly edit all cards and save paper while printing.

Downloading and using ready-made templates
Download additional Word templates that are not in the main set word processor, can be found on the official Microsoft website.
Templates suitable for a business card are in the "Cards" section.

To download ready-made business card templates, you can also use the databases of ready-made designs on the sites vertex42 and avery.
Also, users of licensed versions of MS Word can instantly access the online database of templates.
To do this, go to the program and at the stage of document creation, select the "Cards" tab (picture below):

An internet connection is required to complete this step. Wait a few seconds while the required designs of the selected category are loaded.
Now select the desired design from the list, click on it and click on the "Create" button.


To use a ready-made design from the Internet, download the template you are interested in. The downloaded file must be in .doc or .docx format and open in any version of Word.
Open the document containing the template and make all the necessary edits to the information contained on the business card:

After editing, the document page is ready for printing.
Advice: during document printing, some page parameters may be violated (margins, hyphenation, headers and footers, etc.).
To make the printed business cards completely identical to the electronic version, resave the final Word document in PDF format (File ⇒ Save As ⇒ PDF Document).
The main advantage of working with templates is their versatility. They are suitable for absolutely all versions of MS Word.
Depending on the fonts installed on your computer, only some of the labels may look different.
Using tables to create business cards
If you want to create a business card in Word yourself from scratch, you can use tables or create elements in Canvas mode.
Let's take a closer look at how to work with the first method in all versions of MS Word.
Instructions for Word 2010, 2013, 2016
First you need to set the appropriate markup for your document. To do this, click on the "Layout" tab. Select field options. In the drop-down list, click on the "Narrow" item.
This type is best suited for creating business cards and postcards.

Now create a table (2 columns and 5 lines). To do this, on the main toolbar, go to the Insert tab and click on the Table icon.
Set the required dimension:

The created table will be the base and outline for our business cards.
Stretch it to fill the entire page to look like this:

In the properties of the plate (the Row and Column tabs) enter the width (9 cm) and height (5 cm).

Now you need to remove the indents that are set automatically when creating a table. Their removal is necessary so that the labels are uniform in each cell.
Go to the properties of the table. Select Options. For all margins, set the value to "0 cm". Save your changes.

To make it easier to crop the margins after printing, make them a little lighter. To do this, switch to table design mode.
In the Table Styles box, choose a lighter shade for the outline.

Now let's move on to creating the text of the business cards.
The first step is to align the characters with the ruler.

For text, you can use any tools that are in the Word (different fonts, styles, spacing between characters, etc.).
To create a background, right-click on an empty space in the cell. Open the fill creation window and select the background color you like:

To add a logo, picture, or other element to your business card, use the Insert tab and then select Shapes or Pictures.

To copy the created design to other cells, select the contents of the table row using the Ctrl + C keyboard shortcut and paste it into other lines using the Ctrl + P keys.
The logos must be transferred separately for each cell. To fill the entire table at the same time, select all its columns and create a single fill.

Instructions for Word 2007
To make the layout of the required page to accommodate 8-10 business cards in the 2007 version of Word, click on the "Page Layout" tab. Select the Fields icon.
In the drop-down list, click on "Narrow Field".

Now create a plate so that there are 2 columns and 5 rows on one sheet.
Go to the Insert tab and create a table as shown in the image below:

Make alignment. To do this, go to the properties of the table:


Remove indents inside the table cells, as shown earlier in Figure 14.
To change the color of the borders of our table, select the "Working with tables" tab. Then click on the "Borders" icon and set the size - 0.25 pt.
In the Pen Color window, you can change the shade of the margins.

The basis for the business cards is ready. Now you can start designing the layout.
Type the text you want inside the first cell and align it with a ruler (Figure 16). Choose a color for the background of the business card (Figure 17).
Copy the created design to the rest of the plate cells.
If you indicated the site on the business card and a hyperlink was created, be sure to delete it (select the line and press the right mouse button):

Development of business cards in the "Canvas" mode
In Word, you can create a canvas to work with additional shapes.
To create it, click on Insert ⇒ Illustrations ⇒ Shapes ⇒ Create Canvas (for Word 2010, 2013, 2016) or Insert ⇒ Shapes ⇒ New Canvas (for Word 2007).

Add a rectangle to the canvas and remove the fill from the shape:

Inside the rectangle, you can enter text, add other shapes, logos or pictures (similar to how business cards were created in the table).
Move the pointer over the area of the shape shown in the image below and copy the resulting design.

Cut the business card sheets after printing. To do this as carefully as possible, do not use scissors.
Better to use office scissors or a cutting guillotine. Also, take into account that the standard size of business cards (horizontal position) is 9x5 cm.
Thematic video:
 05 01 medical biochemistry where to work
 Biochemistry who can work
 Types of monopolies: natural, artificial, open, closed